Formatting properties
XSL Formatting Objects (XSL-FO) are the second half of the Extensible Stylesheet Language (XSL). XSL-FO is an XML application that describes how pages will look when presented to a reader. A style sheet uses the XSL transformation language to transform an XML document in a semantic vocabulary into a new XML document that uses the XSL-FO presentational vocabulary. While one can hope that Web browsers will one day know how to directly display data marked up with XSL formatting objects, for now an additional step is necessary in which the output document is further transformed into some other format, such as Adobe’s PDF.
XSL-FO provides a more sophisticated visual layout model than HTML+CSS. Formatting supported by XSL-FO, but not supported by HTML+CSS, includes right-to-left and top-to-bottom text, footnotes, margin notes, page numbers in cross-references, and more. In particular, while CSS (Cascading Style Sheets) is primarily intended for use on the Web, XSL-FO is designed for broader use. You should, for instance, be able to write an XSL style sheet that uses formatting objects to lay out an entire printed book. A different style sheet should be able to transform the same XML document into a Web site.
A Word of Caution about XSL Formatting Objects
This chapter is based on the October 15, 2001 Recommendation of the XSL specification. However, most software does not implement all of the the final recommendation for XSL. In fact, so far there are only a few standalone programs that convert XSL-FO documents into PDF files. There are no Web browsers that can display a document written with XSL formatting objects. Eventually, of course, this should be straightened out as more vendors implement XSL formatting objects.
There
are exactly 56 XSL formatting object elements. These are placed in
the http://www.w3.org/1999/XSL/Format namespace. At
least 99 percent of the time, the chosen prefix is fo.
In this chapter, I use the fo prefix to indicate
this namespace without further comment.
Of the 56 elements, most signify various kinds of rectangular areas. Most of the rest are containers for rectangular areas and spaces. In alphabetical order, these formatting objects are:
fo:basic-linkfo:bidi-overridefo:blockfo:block-containerfo:characterfo:color-profilefo:conditional-page-master-referencefo:declarationsfo:external-graphicfo:floatfo:flowfo:footnotefo:footnote-bodyfo:initial-property-setfo:inlinefo:inline-containerfo:instream-foreign-objectfo:layout-master-setfo:leaderfo:list-blockfo:list-itemfo:list-item-bodyfo:list-item-labelfo:markerfo:multi-casefo:multi-propertiesfo:multi-property-setfo:multi-switchfo:multi-togglefo:page-numberfo:page-number-citationfo:page-sequencefo:page-sequence-masterfo:region-afterfo:region-beforefo:region-bodyfo:region-endfo:region-startfo:repeatable-page-master-alternativesfo:repeatable-page-master-referencefo:retrieve-markerfo:rootfo:simple-page-masterfo:single-page-master-referencefo:static-contentfo:tablefo:table-and-captionfo:table-bodyfo:table-captionfo:table-cellfo:table-columnfo:table-footerfo:table-headerfo:table-rowfo:titlefo:wrapperThe XSL formatting model is based on rectangular boxes called areas that can contain text, empty space, images, or other formatting objects. As with CSS boxes, an area has borders and padding on each of its sides, although CSS's margins are replaced by XSL's space-before and space-after. An XSL formatter reads the formatting objects to determine which areas to place where on the page. Many formatting objects produce single areas (at least most of the time);` but because of page breaks, word wrapping, hyphenation, and other details that must be taken into account when fitting a potentially infinite amount of text into a finite amount of space, some formatting objects do occasionally generate more than one area.
The
formatting objects differ primarily in what they represent. For
example, the fo:list-item-label formatting object is
a box that contains a bullet, a number, or another indicator placed
in front of a list item. A fo:list-item-body
formatting object is a box that contains the text, sans label, of the
list item. And a fo:list-item formatting object is a
box that contains both the fo:list-item-label and
fo:list-item-body formatting objects.
When processed, the formatting objects document is broken up into pages. A Web browser window will normally be treated as one very long page. A print format will often contain many individual pages. Each page contains a number of areas. There are four primary kinds of areas:
1. regions
2. block areas
3. line areas
4. inline areas
These form a rough hierarchy. Regions contain block areas. Block areas contain other block areas, line areas, and content. Line areas contain inline areas. Inline areas contain other inline areas and content. More specifically:
A region is the highest-level container in
XSL-FO. You can think of a page of this book as containing three
regions: the header, the main body of the page, and the footer.
Formatting objects that produce regions include fo:region-body,
fo:region-before, fo:region-after,
fo:region-start, and fo:region-end.
A block area represents a block-level
element, such as a paragraph or a list item. Although block areas may
contain other block areas, there should always be a line break before
the start and after the end of each block area. A block area, rather
than being precisely positioned by coordinates, is placed
sequentially in the area that contains it. As other block areas are
added and deleted before it or within it, the block area’s
position shifts as necessary to make room. A block area may contain
parsed character data, inline areas, line areas, and other block
areas that are sequentially arranged in the containing block area.
Formatting objects that produce block areas include fo:block,
fo:table-and-caption, and fo:list-block.
A line area represents a line of text inside a block. For example, each of the lines in this list item is a line area. Line areas can contain inline areas and inline spaces. There are no formatting objects that correspond to line areas. Instead, the formatting engine calculates the line areas as it decides how to wrap lines inside block areas.
Inline areas are parts of a line such as a
single character, a footnote reference, or a mathematical equation.
Inline areas can contain other inline areas and raw text. Formatting
objects that produce inline areas include fo:character,
fo:external-graphic, fo:inline,
fo:instream-foreign-object, fo:leader,
and fo:page-number.
When taken as a whole, the various formatting objects in an XSL-FO document specify the order in which content is to be placed on pages. However, formatting properties specify the details of formatting such as size, position, font, color, and a lot more. Formatting properties are represented as attributes on the individual formatting object elements.
The
details of many of these properties should be familiar from CSS. Work
is ongoing to ensure that CSS and XSL-FO use the same names to mean
the same things. For example, the CSS font-family
property means the same thing as the XSL font-family
property; and although the syntax for assigning values to properties
is different in CSS and XSL-FO, the meaning of the values themselves
is the same. To indicate that the fo:block element
is formatted in some approximation of Times, you might use this CSS
rule:
fo:block {font-family: 'New York', 'Times New Roman', serif}
The XSL-FO equivalent is to include a
font-family attribute in the fo:block
start tag in this way:
<fo:block font-family="'New York', 'Times New Roman', serif">
Although this is superficially different, the
style name (font-family) and the style value ('New
York', 'Times New
Roman', serif) are the same. CSS's
font-family property is specified as a list of font
names, separated by commas, in order from first choice to last
choice. XSL-FO’s font-family property is
specified as a list of font names, separated by commas, in order from
first choice to last choice. Both CSS and XSL-FO quote font names
that contain white space. Both CSS and XSL-FO understand the keyword
serif to mean an arbitrary serif font.
Of
course, XSL formatting objects support many properties that have no
CSS equivalent, such as destination-placement-offset,
block-progression-dimension, character,
and hyphenation-keep. You need to learn these to
take full advantage of XSL. The standard XSL-FO properties follow:
absolute-positionactive-statealignment-adjustalignment-baselineauto-restoreazimuthbackgroundbackground-attachmentbackground-colorbackground-imagebackground-positionbackground-position-horizontalbackground-position-verticalbackground-repeatbaseline-shiftblank-or-not-blankblock-progression-dimensionborderborder-after-colorborder-after-precedenceborder-after-styleborder-after-widthborder-before-colorborder-before-precedenceborder-before-styleborder-before-widthborder-bottomborder-bottom-colorborder-bottom-styleborder-bottom-widthborder-collapseborder-colorborder-end-colorborder-end-precedenceborder-end-styleborder-end-widthborder-leftborder-left-colorborder-left-styleborder-left-widthborder-rightborder-right-colorborder-right-styleborder-right-widthborder-separationborder-spacingborder-start-colorborder-start-precedenceborder-start-styleborder-start-widthborder-styleborder-topborder-top-colorborder-top-styleborder-top-widthborder-widthbottombreak-afterbreak-beforecaption-sidecase-namecase-titlecharacterclearclipcolorcolor-profile-namecolumn-countcolumn-gapcolumn-numbercolumn-widthcontent-heightcontent-typecontent-widthcountrycuecue-aftercue-beforedestination-placement-offsetdirectiondisplay-aligndominant-baselineelevationempty-cellsend-indentends-rowextentexternal-destinationfloatflow-namefontfont-familyfont-selection-strategyfont-sizefont-size-adjustfont-stretchfont-stylefont-variantfont-weightforce-page-countformatglyph-orientation-horizontalglyph-orientation-verticalgrouping-separatorgrouping-sizeheighthyphenatehyphenation-characterhyphenation-keephyphenation-ladder-counthyphenation-push-character-counthyphenation-remain-character-countidindicate-destinationinitial-page-numberinline-progression-dimensioninternal-destinationkeep-togetherkeep-with-nextkeep-with-previouslanguagelast-line-end-indentleader-alignmentleader-lengthleader-patternleader-pattern-widthleftletter-spacingletter-valuelinefeed-treatmentline-heightline-height-shift-adjustmentline-stacking-strategymarginmargin-bottommargin-leftmargin-rightmargin-topmarker-class-namemaster-namemaster-referencemax-heightmaximum-repeatsmax-widthmedia-usagemin-heightmin-widthnumber-columns-repeatednumber-columns-spannednumber-rows-spannedodd-or-evenorphansoverflowpaddingpadding-afterpadding-beforepadding-bottompadding-endpadding-leftpadding-rightpadding-startpadding-toppage-break-afterpage-break-beforepage-break-insidepage-heightpage-positionpage-widthpausepause-afterpause-beforepitchpitch-rangeplay-duringpositionprecedenceprovisional-distance-between-startsprovisional-label-separationreference-orientationref-idregion-namerelative-alignrelative-positionrendering-intentretrieve-boundaryretrieve-class-nameretrieve-positionrichnessrightrolerule-stylerule-thicknessscalingscaling-methodscore-spacesscriptshow-destinationsizesource-documentspace-afterspace-beforespace-endspace-startspace-treatmentspanspeakspeak-headerspeak-numeralspeak-punctuationspeech-ratesrcstart-indentstarting-statestarts-rowstresssuppress-at-line-breakswitch-totable-layouttable-omit-footer-at-breaktable-omit-header-at-breaktarget-presentation-contexttarget-processing-contexttarget-stylesheettext-aligntext-align-lasttext-altitudetext-decorationtext-depthtext-indenttext-shadowtext-transformtoptreat-as-word-spaceunicode-bidivertical-alignvisibilityvoice-familyvolumewhite-spacewhite-space-collapsewidowswidthword-spacingwrap-optionwriting-modexml:langz-indexXSL-FO is a complete XML vocabulary for laying out text on a page. An XSL-FO document is simply a well-formed XML document that uses this vocabulary. That means it has an XML declaration, a root element, child elements, and so forth. It must adhere to all the well-formedness rules of any XML document, or formatters will not accept it. By convention, a file that contains XSL formatting objects has the three-letter extension .fob or the two-letter extension .fo. However, it might have the suffix .xml because it also is a well-formed XML file.
Listing
19-1 is a simple document marked up using XSL formatting objects. The
root of the document is fo:root. This element
contains a fo:layout-master-set and a
fo:page-sequence. The fo:layout-master-set
element contains fo:simple-page-master child
elements. Each fo:simple-page-master describes a
kind of page on which content will be placed. Here there's only one
very simple page, but more complex documents can have different
master pages for first, right, and left, body pages, front matter,
back matter, and more, each with a potentially different set of
margins, page numbering, and other features. The name bu which the
page master will be referred to is given in the master-name
attribute.
Content
is placed on copies of the master page using a fo:page-sequence.
The fo:page-sequence has a master-reference
attribute naming the master page to be used. Its fo:flow
child element holds the actual content to be placed on the pages. The
content here is given as two fo:block children, each
with a font-size property of 20 points, a
font-family property of serif, and
a line-height of 30 points.
Listing 19-1 A simple XSL-FO document
<?xml version="1.0"?>
<fo:root xmlns:fo="http://www.w3.org/1999/XSL/Format">

  <fo:layout-master-set>
    <fo:simple-page-master master-name="only">
      <fo:region-body/>
    </fo:simple-page-master>
  </fo:layout-master-set>

  <fo:page-sequence master-reference="only">

    <fo:flow flow-name="xsl-region-body">
      <fo:block font-size="20pt" font-family="serif"
                line-height="30pt">
        Hydrogen
      </fo:block>
      <fo:block font-size="20pt" font-family="serif"
                line-height="30pt" >
        Helium
      </fo:block>
    </fo:flow>

  </fo:page-sequence>

</fo:root>
Although you could write a document such as Listing 19-1 by hand, doing so would lose all the benefits of content-format independence achieved by XML. Normally, you write an XSLT style sheet that transforms an XML source document into XSL-FO. Listing 19-2 is the XSLT style sheet that produced Listing 19-1 by transforming the previous chapter’s Listing 17-1.
Listing 19-2 A transformation from a source vocabulary to XSL formatting objects
<?xml version="1.0"?>
<xsl:stylesheet version="1.0"
  xmlns:xsl="http://www.w3.org/1999/XSL/Transform"
  xmlns:fo="http://www.w3.org/1999/XSL/Format">

  <xsl:output indent="yes"/>

  <xsl:template match="/">
    <fo:root xmlns:fo="http://www.w3.org/1999/XSL/Format">

      <fo:layout-master-set>
        <fo:simple-page-master master-name="only">
          <fo:region-body/>
        </fo:simple-page-master>
      </fo:layout-master-set>

      <fo:page-sequence master-reference="only">

        <fo:flow flow-name="xsl-region-body">
          <xsl:apply-templates select="//ATOM"/>
        </fo:flow>

      </fo:page-sequence>

    </fo:root>
  </xsl:template>

  <xsl:template match="ATOM">
    <fo:block font-size="20pt" font-family="serif"
              line-height="30pt">
      <xsl:value-of select="NAME"/>
    </fo:block>
  </xsl:template>

</xsl:stylesheet>At
the time of this writing, no browser can directly display XML
documents transformed into XSL formatting objects. However, there are
several applications that can convert an XSL-FO document into a
viewable format such as PDF or TeX. The one used here is the XML
Apache project's open source FOP. FOP is a command-line Java program
that converts FO (formatting object) documents to Adobe Acrobat PDF
files. At the time of this writing, the most recent version of FOP is
0.20.4, which incompletely supports a subset of the formatting
objects and properties in the XSL 1.0 Recommendation. You can
download the latest version of FOP from http://xml.apache.org/fop/.
On the CD-ROM
FOP is included on the CD-ROM in the directory utilities/fop. However, chances are good that a version that supports XSL-FO more completely will have been released by the time you're reading this, so you should try to get it from the Web if you can.
FOP is a Java program that should run on any platform with a reasonably compatible Java 1.2 virtual machine. To install it, just unpack the distribution and add the directory where you put it (I use /usr/local/xml/fop) to your path.
The
directory where you installed it contains, among other files, fop.bat
and fop.sh. Use fop.bat for Windows and fop.sh for Unix. other
platforms can run the Java program directly by adding its JAR
archives to your CLASSPATH and invoking the org.apache.fop.apps.Fop
class. Run it from the command line with arguments specifying the
input and output files. For example,
C:\> fop.bat -fo 19-1.fo -pdf 19-1.pdf
The output will look something like this:
[INFO] FOP 0.20.4
[INFO] building formatting object tree
[INFO] [1]
[INFO] Parsing of document complete, stopping renderer
Here 19-1.fo is the input XML file that uses the formatting object vocabulary. 19-1.pdf is the output PDF file that can be displayed and printed by Adobe Acrobat or other programs that read PDF files.
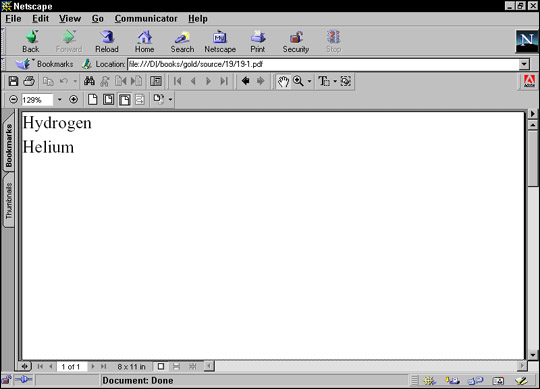
Although PDF files are themselves ASCII text, this isn’t a book about PostScript, so there’s nothing to be gained by showing you the exact output of the above command. If you’re curious, open the PDF file in any text editor. Instead, Figure 19-1 shows the rendered file displayed in Netscape Navigator using the Acrobat plug-in.
Figure 19-1: The PDF file displayed in Netscape Navigator
PDF files are not the only or even the primary eventual destination format for XML documents styled with XSL formatting objects. Certainly, one would hope that Web browsers will directly support XSL formatting objects in the not too distant future. For now, PDF files are the only convenient format, so that’s what I show in this chapter. Eventually, more software will be able to read and display these files.
The
root element of a formatting objects document is fo:root.
This element contains one fo:layout-master-set
element and one or more fo:page-sequence elements.
The fo:page-sequence elements contain content; that
is, text and images to be placed on the pages. The
fo:layout-master-set contains templates for the
pages that will be created. When the formatter reads an XSL-FO
document, it creates a page based on the first template in the
fo:layout-master-set. Then it fills it with content
from the fo:page-sequence. When it's filled the
first page, it instantiates a second page based on a template, and
fills it with content. The process continues until the formatter runs
out of content.
The
fo:root element generally has an xmlns:fo
attribute with the value http://www.w3.org/1999/XSL/Format
and may (though it generally does not) have an id
attribute. The fo:root element exists just to
declare the namespace and be the document root. It has no direct
effect on page layout or formatting.
The
page templates are called page masters. Page masters are
similar in purpose to QuarkXPress master pages or PowerPoint slide
masters. Each defines a general layout for a page including its
margins, the sizes of the header, footer, and body area of the page,
and so forth. Each actual page in the rendered document is based on
one master page, and inherits certain properties like margins, page
numbering, and layout from that master page. XSL-FO 1.0 defines
exactly one kind of page master, the fo:simple-page-master,
which represents a rectangular page. The fo:layout-master-set
contains one or more fo:simple-page-master elements
that define master pages.
Note
Future versions of XSL-FO will add other kinds of page masters, possibly including non-rectangular pages.
Each
master page is represented by a fo:simple-page-master
element. A fo:simple-page-master element defines a
page layout, including the size of its before region, body region,
after region, end region, and start region. Figure 19-2 shows the
typical layout of these parts. One thing that may not be obvious from
this picture is that the body region overlaps the other four regions
(though not the page margins); that is, the body is everything inside
the thick black line including the start, end, before, and after
regions.

Figure 19-2: The layout of the parts of a simple page of English text
Note
In normal English text, the end region is the right side of the page and the start region is the left side of the page. This is reversed in Hebrew or Arabic text, because these languages are written from right to left. In almost all modern languages, the before region is the header and the after region is the footer, but this could be reversed in a language that wrote from bottom to top.
The
fo:simple-page-master element has three main
attributes:
master-name: the name by
which page sequences will reference this master page
page-height: the height of
the page
page-width: the width of the
page
If
the page-height and page-width are
not provided, then the formatter chooses a reasonable default based
on the media in use (for example, 8.5" × 11").
Other attributes commonly applied to page masters include:
The margin-bottom,
margin-left, margin-right, and
margin-top attributes, or the shorthand margin
attribute
The writing-mode attribute
that determines which direction text flows on the page, for example,
left-to-right or right-to-left or top-to-bottom
The reference-orientation
attribute that specifies in 90-degree increments whether and how much
the content is rotated
For
example, here is a fo:layout-master-set containing
one fo:simple-page-master named US-Letter.
It specifies an 8.5 × 11-inch page with half-inch margins on
each side. It contains a single region, the body, into which all
content will be placed.
<fo:layout-master-set>
  <fo:simple-page-master  master-name="US-Letter"
     page-height="11in"   page-width="8.5in"
     margin-top="0.5in"   margin-bottom="0.5in"
     margin-left="0.5in"  margin-right="0.5in">
    <fo:region-body/>
  </fo:simple-page-master>
</fo:layout-master-set>The
designer sets the size of the body (center) region, header, footer,
end region, and start region, as well as the distances between them,
by adding region child elements to the fo:simple-page-master.
These are:
fo:region-before
fo:region-after
fo:region-body
fo:region-start
fo:region-end
The
fo:region-before and fo:region-after
elements each have an extent attribute that gives
the height of these regions. Their width extends from the left side
of the page to the right side. The fo:region-start
and fo:region-end elements each have an extent
attribute that specifies their widths. Their height extends from the
bottom of the start region to the top of the end region. (This
assumes normal Western text. Details would be rotated in Chinese or
Hebrew or some other non-right-to-left-top-to-bottom
script.)
The
fo:region-body does not have an extent
attribute. Instead, the size of the body is everything inside the
page margins. Thus, the region body overlaps the other four regions
on the page. If you place text into the body and the other four
regions, text will be drawn on top of other content. To avoid this,
you must set the left margin of the body to be as large or larger
than the extent of the start region, the top margin of the body to be
as large or larger than the extent of the before region, and so on.
Each
of the five regions of a simple page master may be filled with
content from a fo:flow or fo:static-content
element when the document is processed. However, these elements do
not contain that content. Instead, they simply give the dimensions of
the boxes the formatter will build to put content in. They are
blueprints for the boxes, not the boxes themselves.
For
example, this fo:simple-page-master creates pages
with one-inch before and after regions. The region body will extend
vertically from the bottom of the before region to the top of the
after region. It will extend horizontally from the left side of the
page to the right side of the page because there is no start or end
region.
  <fo:simple-page-master master-name="table_page">
    <fo:region-before extent="1.0in"/>
    <fo:region-body margin-top="1.0in" margin-bottom="1.0in"/>
    <fo:region-after extent="1.0in"/>
  </fo:simple-page-master>
For another example, here is a
fo:layout-master-set that makes all outer regions
one inch. Furthermore, the page itself has a half-inch margin on all
sides.
<fo:layout-master-set>
  <fo:simple-page-master    master-name="only"
       page-width="8.5in"   page-height="11in"
       margin-top="0.5in"   margin-bottom="0.5in"
       margin-left="0.5in"  margin-right="0.5in">
    <fo:region-start  extent="1.0in"/>
    <fo:region-before extent="1.0in"/>
    <fo:region-body   margin="1.0in"/>
    <fo:region-end    extent="1.0in"/>
    <fo:region-after  extent="1.0in"/>
  </fo:simple-page-master>
</fo:layout-master-set>
The body regions from pages based on this page master will be 5.5 inches wide and 8 inches high. That's calculated by subtracting the sum of the body region's margins and the page margins from the size of the page.
In
addition to a fo:layout-master-set, each formatting
object document contains one or more fo:page-sequence
elements. Each page in the sequence has an associated page master
that defines how the page will look. Which page master this is, is
determined by the master-reference attribute of the
fo:page-sequence element. This must match the name
of a page master in the fo:layout-master-set.
Listing 19-1 used a fo:simple-master-page named only
to fill this role, but it is not uncommon to have more than one
master page. In this case, the master pages might be grouped as part
of a fo:page-sequence-master instead. For instance,
you could have one master page for the first page of each chapter, a
different one for all the subsequent left-hand pages, and a third for
all the subsequent right-hand pages. Or, there could be one simple
page master for a table of contents, another for body text, and a
third for the index. In this case, you use one page sequence each for
the table of contents, the body text, and the index.
Each page sequence contains three child elements in this order:
1. An optional fo:title
element containing inline content that can be used as the title of
the document. This would normally be placed in the title bar of the
browser window like the TITLE element in HTML
2. Zero or more fo:static-content
elements containing text to be placed on every page
3. One fo:flow element
containing data to be placed on each page in turn
The
main difference between a fo:flow and a
fo:static-content is that text from the flow isn't
placed on more than one page, whereas the static content is. For
example, the words you're reading now are flow content that only
appear on this page, whereas the part and chapter titles at the top
of the page are static content that is repeated from page to page.
The
fo:flow element contains, in order, the elements to
be placed on the page. As each page fills with elements from the
flow, a new page is created with the next master page in the page
sequence master for the elements that remain in the flow. With a
simple page master, the same page will be instantiated repeatedly, as
many times as necessary to hold all the content.
The
fo:static-content element contains information to be
placed on each page. For instance, it may place the title of a book
in the header of each page. Static content can be adjusted depending
on the master page. For instance, the part title may be placed on
left-hand pages, and the chapter title on right-hand pages. The
fo:static-content element can also be used for items
such as page numbers that have to be calculated from page to page. In
other words, what's static is not the text, but the calculation that
produces the text.
The
fo:flow object holds the actual content, which will
be placed on the instances of the master pages. This content is
composed of a sequence of fo:block,
fo:block-container, fo:table-and-caption,
fo:table, and fo:list-block
elements. This section sticks to basic fo:block
elements, which are roughly equivalent HTML's DIV
elements. Later in this chapter, you learn more block-level elements
that a flow can contain.
For example, here is a basic flow containing the names of several atoms, each in its own block:
<fo:flow flow-name="xsl-region-body">
  <fo:block>Actinium</fo:block>
  <fo:block>Aluminum</fo:block>
  <fo:block>Americium</fo:block>
</fo:flow>
The flow-name attribute of the
fo:flow, here with the value xsl-region-body,
specifies which of the five regions of the page this flow's content
will be placed in. The allowed values are:
xsl-region-body
xsl-region-before
xsl-region-after
xsl-region-start
xsl-region-end
For example, a flow for the header has a flow-name value of xsl-region-before. A flow for the body would have a flow-name of xsl-region-body.
Only one fo:flow is allowed in the same page sequence.
The other four regions have to be filled with a fo:static-content if anything.
You
can now put together a complete style sheet that lays out the entire
periodic table. Listing 19-3 demonstrates this with an XSLT style
sheet that converts the periodic table into XSL formatting objects.
The flow grabs all the atoms and places each one in its own block. A
simple page master named only defines an A4-sized
master page in landscape mode with half-inch margins on each side.
Listing 19-3 A basic style sheet for the periodic table
<?xml version="1.0"?>
<xsl:stylesheet version="1.0"
  xmlns:xsl="http://www.w3.org/1999/XSL/Transform"
  xmlns:fo="http://www.w3.org/1999/XSL/Format">

  <xsl:template match="/">
    <fo:root xmlns:fo="http://www.w3.org/1999/XSL/Format">

      <fo:layout-master-set>

        <fo:simple-page-master master-name="A4"
           page-width="297mm"  page-height="210mm"
           margin-top="0.5in"  margin-bottom="0.5in"
           margin-left="0.5in" margin-right="0.5in">
          <fo:region-body/>
        </fo:simple-page-master>

      </fo:layout-master-set>

      <fo:page-sequence master-reference="A4">

        <fo:flow flow-name="xsl-region-body">
          <xsl:apply-templates select="//ATOM"/>
        </fo:flow>

      </fo:page-sequence>

    </fo:root>
  </xsl:template>

  <xsl:template match="ATOM">
    <fo:block><xsl:value-of select="NAME"/></fo:block>
  </xsl:template>

</xsl:stylesheet>
Figure 19-3 shows the resulting document after Listing 19-3 has been run through an XSLT processor to produce an XSL-FO document, and that document has been run through FOP to produce a PDF file.

Figure 19-3: The output of Listing 19-3
Whereas
each piece of the content of a fo:flow element
appears on one page, each piece of the content of a fo:static-content
element appears on every page. For instance, if this book were laid
out in XSL-FO, then both the header at the top of the page and the
footer at the bottom of the page would have been produced by
fo:static-content elements. You do not have to use
fo:static-content elements, but if you do use them
they must appear before all the fo:flow elements in
the page sequence.
fo:static-content
elements have the same attributes and contents as a fo:flow.
However, because a fo:static-content cannot break
its contents across multiple pages if necessary, it generally has
less content than a fo:flow. For example, Listing
19-4 uses a fo:static-content to place the words
"The Periodic Table" in the header of each page.
Listing 19-4 Using fo:static-content to generate a header
<?xml version="1.0"?>
<xsl:stylesheet version="1.0"
  xmlns:xsl="http://www.w3.org/1999/XSL/Transform"
  xmlns:fo="http://www.w3.org/1999/XSL/Format">

  <xsl:template match="/">
    <fo:root xmlns:fo="http://www.w3.org/1999/XSL/Format">

      <fo:layout-master-set>

        <fo:simple-page-master master-name="A4"
           page-width="297mm"   page-height="210mm"
           margin-top="0.5in"  margin-bottom="0.5in"
           margin-left="0.5in" margin-right="0.5in">
          <fo:region-before extent="1.0in"/>
          <fo:region-body margin-top="1.0in"/>
        </fo:simple-page-master>

      </fo:layout-master-set>

      <fo:page-sequence master-reference="A4">

        <fo:static-content flow-name="xsl-region-before">
          <fo:block>The Periodic Table</fo:block>
        </fo:static-content>

        <fo:flow flow-name="xsl-region-body">
          <xsl:apply-templates select="//ATOM"/>
        </fo:flow>

      </fo:page-sequence>

    </fo:root>
  </xsl:template>

  <xsl:template match="ATOM">
    <fo:block><xsl:value-of select="NAME"/></fo:block>
  </xsl:template>

</xsl:stylesheet>
Figure 19-4 shows the last page of the PDF file ultimately produced by Listing 19-4. The same text, "The Periodic Table", appears on all four pages of the document.
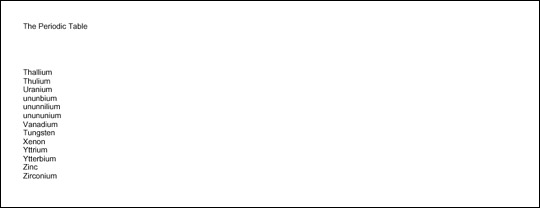
Figure 19-4: Static content in the header
The
fo:page-sequence element has eight optional
attributes that define page numbers for the sequence. These are:
initial-page-number
force-page-count
format
letter-value
country
language
grouping-separator
grouping-size
The
initial-page-number attribute gives the number of
the first page in this sequence. The most likely value for this
attribute is 1, but it could be a larger number if the previous pages
are in a different fo:page-sequence or even a
different document. It can also be set to one of these three key
words:
auto: 1 unless pages from a
preceding fo:page-sequence have pushed that up. This
is the default.
auto-odd: Same as auto,
but add 1 if that value is an even number; that is, start on an odd
page.
auto-even: Same as auto,
but add 1 if that value is an odd number; that is, start on an even
page.
The
force-page-count attribute is used to require the
document to have an even or odd number of pages or to end on an even
or odd page. This is sometimes necessary for printed books. The
force-page-count attribute can have one of these six
keyword values:
auto: Make the last page an
odd page if the initial-page-number of the next
fo:page-sequence is even. Make the last page an
even-page if the initial-page-number of the next page-sequence is
odd. If there is no next fo:page-sequence or if the
next fo:page-sequence does not specify an
initial-page-number, then let the last page fall
where it may.
even: Require an even number
of pages, inserting an extra blank page if necessary to make it so.
odd: Require an odd number
of pages, inserting an extra blank page if necessary to make it so.
end-on-even: Require the
last page to have an even page number, inserting an extra blank page
if necessary to make it so.
end-on-odd: Require the last
page to have an odd page number, inserting an extra blank page if
necessary to make it so.
no-force: Do not require
either an even or odd number of pages.
The
country attribute should be set to an RFC 1766
country code. The language attribute should be set
to an RFC 1766 language code (http://www.ietf.org/rfc/rfc1766.txt).
For instance, you would use en to indicate English
and us to indicate the United States.
Cross-Reference
These are
essentially the same as the legal values for xml:lang
that were discussed in Chapter 11, except that the country code and
language codes are placed in two separate attributes rather than in
one attribute.
The
remaining four attributes have exactly the same syntax and meaning as
when used as attributes of the xsl:number element
from XSLT, so I won't repeat that discussion here.
Cross-Reference
The xsl:number
element and the format, letter-value,
grouping-separator, and grouping-size
attributes are discussed in the "Number to String Conversion"
section in Chapter 18.
The
fo:page-number formatting object is an empty inline
element that inserts the number of the current page. The formatter is
responsible for determining what that number is. This element can
have a variety of formatting attributes common to inline elements
such as font-family and text-decoration.
For example, Listing 19-5 uses fo:static-content and
fo:page-number to put the page number at the bottom
of every page:
Listing 19-5 Using fo:page-number to place the page number in the footer
<?xml version="1.0"?>
<xsl:stylesheet version="1.0"
  xmlns:xsl="http://www.w3.org/1999/XSL/Transform"
  xmlns:fo="http://www.w3.org/1999/XSL/Format">

  <xsl:template match="/">
    <fo:root xmlns:fo="http://www.w3.org/1999/XSL/Format">

      <fo:layout-master-set>

        <fo:simple-page-master master-name="A4"
           page-width="297mm"  page-height="210mm"
           margin-top="0.5in"  margin-bottom="0.5in"
           margin-left="0.5in" margin-right="0.5in">
          <fo:region-before extent="1.0in"/>
          <fo:region-body margin-top="1.0in"
                          margin-bottom="1.0in"/>
          <fo:region-after  extent="1.0in"/>
        </fo:simple-page-master>

      </fo:layout-master-set>

      <fo:page-sequence master-reference="A4"
        initial-page-number="1" language="en" country="us">

        <fo:static-content flow-name="xsl-region-before">
          <fo:block>The Periodic Table</fo:block>
        </fo:static-content>

        <fo:static-content flow-name="xsl-region-after">
          <fo:block>p. <fo:page-number/></fo:block>
        </fo:static-content>

        <fo:flow flow-name="xsl-region-body">
          <xsl:apply-templates select="//ATOM"/>
        </fo:flow>

      </fo:page-sequence>

    </fo:root>
  </xsl:template>

  <xsl:template match="ATOM">
    <fo:block><xsl:value-of select="NAME"/></fo:block>
  </xsl:template>

</xsl:stylesheet>
Figure 19-5 shows the second page of the PDF file generated from Listing 19-5. The page number appears at the bottom of this and every other page in the document.
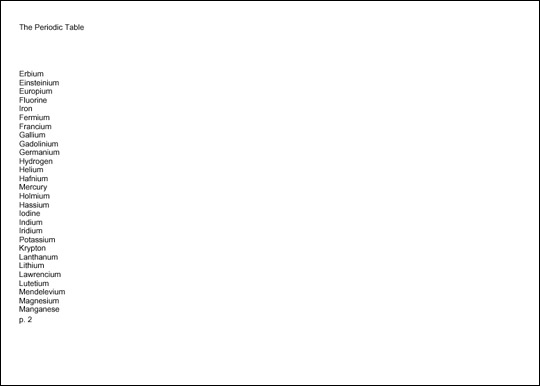
Figure 19-5: Automatically generated page numbers in the footer
Each
page the formatter creates is associated with a master page from the
fo:layout-master-set that defines how the page will
look. Which master page this is, is determined by the
master-reference attribute of the fo:page-sequence
element. Listing 19-3 through 19-5 used a single
fo:simple-master-page named A4 to
fill this role, but it is not uncommon to have more than one master
page. For instance, you could use one master page for the first page
of each chapter, a different one for all the subsequent left-hand
pages, and a third for all the subsequent right-hand pages. In this
case, the master pages might be grouped as part of a
fo:page-sequence-master instead.
The
fo:page-sequence-master element is a child of the
fo:layout-master-set that lists the order in which
particular master pages will be instantiated using one or more of
these three child elements:
fo:single-page-master-reference
fo:repeatable-page-master-reference
fo:repeatable-page-master-alternatives
The
fo:single-page-master-reference
and fo:repeatable-page-master-reference elements
each have a master-reference attribute that
specifies which fo:simple-master-page their pages
are based on. The fo:repeatable-page-master-alternatives
has child fo:conditional-page-master-reference
elements that are instantiated based on various conditions. Each of
these child fo:conditional-page-master-reference
elements has a master-reference
attribute that specifies which fo:simple-master-page
to use if its condition is satisfied.
The
simplest is fo:single-page-master-reference whose
master-reference attribute identifies one master
page to be instantiated. For example, this fo:layout-master-set
contains a fo:page-sequence-master element named
contents that says that all text should be placed on
a single instance of the master page named A4:
<fo:layout-master-set>

  <fo:simple-page-master master-name="A4"
      page-width="297mm"  page-height="210mm"
      margin-top="0.5in"  margin-bottom="0.5in"
      margin-left="0.5in" margin-right="0.5in">
    <fo:region-body/>
  </fo:simple-page-master>

  <fo:page-sequence-master master-name="contents">
    <fo:single-page-master-reference master-reference="A4"/>
  </fo:page-sequence-master>

</fo:layout-master-set>
This page sequence master only allows the creation of a single page. Technically, it's an error if there's more content than can fit on this one page. However, in practice most formatters simply repeat the last page used until they have enough pages to hold all the content.
Now consider this page sequence master:
<fo:page-sequence-master master-name="contents">
  <fo:single-page-master-reference master-name="A4"/>
  <fo:single-page-master-reference master-name="A4"/>
</fo:page-sequence-master>
This provides for up to two pages, each based
on the master page named A4. If the first page fills
up, a second is created. If that page fills up, then the formatter
may throw an error, or it may create extra pages.
The
same technique can be used to apply different master pages. For
example, this sequence specification bases the first page on the
master page named front and the second on the master
page named back:
<fo:page-sequence-master master-name="contents">
  <fo:single-page-master-reference master-reference="front"/>
  <fo:single-page-master-reference master-reference="back"/>
</fo:page-sequence-master>
The first page the formatter creates will be based on the master page named front. The second page created will be based on the master page named back. If the second page fills up, the formatter may throw an error; or it may create extra pages based on back, the last master page instantiated.
Of
course, you usually don't know in advance exactly how many pages
there will be. The fo:repeatable-page-master-reference
element lets you specify that as many pages as necessary will be used
to hold the content, all based on a single master page. The
master-reference attribute identifies which master
page will be repeated. For example, this page sequence master will
use as many copies of the master page named A4 as
necessary to hold all the content:
<fo:page-sequence-master master-name="contents">
  <fo:repeatable-page-master-reference master-reference="A4"/>
</fo:page-sequence-master>
Alternately, you can set the maximum-repeats
attribute of the fo:repeatable-page-master-reference
element to limit the number of pages that will be created. For
instance, this fo:page-sequence-master generates at
most 10 pages per document:
<fo:page-sequence-master master-name="contents">
  <fo:repeatable-page-master-reference master-reference="A4"
                                       maximum-repeats="10"/>
</fo:page-sequence-master>
This also lets you do things like using one master for the first two pages, another for the next three pages, and a third master for the next 10 pages.
The
fo:repeatable-page-master-alternatives element
specifies different master pages for the first page, even pages, odd
pages, blank pages, last even page, and last odd page. This is more
designed for a chapter of a printed book where the first and last
pages, as well the even and odd pages, traditionally have different
margins, headers, and footers.
Because
a fo:repeatable-page-master-alternatives element
needs to refer to more than one master page, it can't use a
master-reference attribute such as
fo:single-page-master-reference and
fo:repeatable-page-master-reference. Instead, it has
fo:conditional-page-master-reference child elements.
Each of these has a master-reference attribute that
identifies the master page to instantiate given that condition. The
conditions themselves are determined by three attributes:
page-position: This
attribute can be set to first, last,
rest, or any to identify it as
applying only to the first page, last page, any page except the
first, or any page respectively.
odd-or-even: This attribute
can be set to odd, even, or any
to identify it as applying only to odd pages, only to even pages, or
to all pages respectively.
blank-or-not-blank: This
attribute can be set to blank, not-blank,
or any to identify it as applying only to blank
pages, only to pages that contain content, or to all pages
respectively.
For
example, this page sequence master says that the first page should be
based on the master page named letter_first but that
all subsequent pages should use the master page named letter:
<fo:page-sequence-master master-name="contents">
  <fo:repeatable-page-master-alternatives>
    <fo:conditional-page-master-reference
      page-position="first" master-reference="letter_first"/>
    <fo:conditional-page-master-reference
      page-position="rest"  master-reference="letter"/>
  </fo:repeatable-page-master-alternatives>
</fo:page-sequence-master master-reference="contents">
If the content overflows the first page, the remainder will be placed on a second page. If it overflows the second page, a third page will be created. As many pages as needed to hold all the content will be constructed.
The
content (as opposed to markup) of an XSL-FO document is mostly text.
Non-XML content such as GIF and JPEG images can be included in a
fashion similar to the IMG element of HTML. Other
forms of XML content, such as MathML and SVG, can be embedded
directly inside the XSL-FO document. This content is stored in
several kinds of elements including:
Block-level formatting objects
Inline formatting objects
Table formatting objects
Out-of-line formatting objects
All
of these different kinds of elements are descendants of either a
fo:flow or a fo:static-content
element. They are never placed directly on page masters or page
sequences.
A block-level formatting object is drawn as a rectangular area separated by a line break and possibly extra white space from any content that precedes or follows it. Blocks may contain other blocks, in which case the contained blocks are also separated from the containing block by a line break and perhaps extra white space. Block-level formatting objects include:
fo:block
fo:block-container
fo:table-and-caption
fo:table
fo:list-block
The
fo:block element is the XSL-FO equivalent of
display: block in CSS or DIV in
HTML. Blocks may be contained in fo:flow elements,
other fo:block elements, and fo:static-content
elements. fo:block elements may contain other
fo:block elements, other block-level elements such
as fo:table and fo:list-block, and
inline elements such as fo:inline and
fo:page-number. Block-level elements may also
contain raw text. For example:
<fo:block>The Periodic Table, Page <fo:page-number/></fo:block>
The block-level elements generally have attributes for both area properties and text-formatting properties. The text-formatting properties are inherited by any child elements of the block unless overridden.
Caution
As of version
0.20.4, FOP does not support fo:block-container or
fo:table-and-caption.
An inline formatting object is also drawn as a rectangular area that may contain text or other inline areas. However, inline areas are most commonly arranged in lines running from left to right. When a line fills up, a new line is started below the previous one. The exact order in which inline elements are placed depends on the writing mode. For example, when working in Hebrew or Arabic, inline elements are first placed on the right and then fill to the left. Inline formatting objects include:
fo:bidi-override
fo:character
fo:external-graphic
fo:initial-property-set
fo:instream-foreign-object
fo:inline
fo:inline-container
fo:leader
fo:page-number
fo:page-number-citation
Caution
As of version
0.20.4, FOP does not support fo:bidi-override,
fo:initial-property-set, or fo:inline-container.
The
table formatting objects are the XSL-FO equivalents of CSS2 table
properties. However, tables do work somewhat more naturally in XSL-FO
than in CSS. For the most part, an individual table is a block-level
object, while the parts of the table aren't really either inline or
block level. However, an entire table can be turned into an inline
object by wrapping it in a fo:inline-container.
There are nine XSL table formatting objects:
fo:table-and-caption
fo:table
fo:table-caption
fo:table-column
fo:table-header
fo:table-footer
fo:table-body
fo:table-row
fo:table-cell
The
root of a table is either a fo:table or a
fo:table-and-caption that contains a fo:table
and a fo:caption. The fo:table
contains a fo:table-header, fo:table-body,
and fo:table-footer. The table body contains
fo:table-row elements that are divided up into
fo:table-cell elements.
Caution
FOP 0.20.4 has
limited support for the table formatting objects, and none at all for
fo:table-and-caption and fo:table-caption.
There are three "out-of-line" formatting objects:
fo:float
fo:footnote
fo:footnote-body
Out-of-line formatting objects "borrow" space from existing inline or block objects. On the page, they do not necessarily appear between the same elements that they appeared between in the input formatting object XML tree.
Caution
FOP 0.20.4 does
not support fo:float.
A
rule is a block-level horizontal line inserted into text similar to
the line below the chapter title on the first page of this chapter.
The HR element in HTML produces a rule. A leader is
a line that extends from the right side of left-aligned text in the
middle of a line to the left side of some right-aligned text on the
same line. It's most commonly made up of dots, although other
characters can be used. Leaders are commonly seen in menus and tables
of contents. In fact, if you flip back to the table of contents at
the beginning of this book, you'll see leaders between chapter and
section titles and the page numbers.
In
XSL-FO both leaders and rules are produced by the fo:leader
element. This is an inline element that represents a leader, although
it can easily serve as a rule by placing it inside a fo:block.
Six attributes describe the appearance of a leader:
leader-alignment: This can
be set to reference-area or page to
indicate that the start edge of the leader should be aligned with the
start edge of the named item. It can also be set to none
or inherit.
leader-length: The length of
the leader, such as 12pc or 5in.
leader-pattern: This can be
set to space, rule, dots,
use-content, or inherit. The
use-content value means that the leader characters
should be read from the content of the fo:leader
element.
leader-pattern-width: This
property can be set to a specific length such as 2mm
or to use-font-metrics, which indicates that the
leader should simply be as big as it would naturally be. This is not
the length of the entire leader (which is set by leader-length);
it is the length of each repeating pattern in the leader. If
necessary, white space will be added to stretch each pattern out to
the requested length.
rule-style: This property
has the same values as the CSS border-style
properties; that is, none, dotted,
dashed, solid, double,
groove, ridge, and inherit.
rule-thickness: This
property is the thickness (width) of the rule; 1pt by default.
In
addition, a number of other common properties apply to leaders. For
instance, you can use the font-family property to
change the font in which a leader is drawn or the color
property to change the color in which a leader is drawn. For example,
this is a green horizontal line that’s 7.5 inches long and 2
points thick:
<fo:block>
  <fo:leader leader-length="7.5in" leader-pattern="rule"
             rule-thickness="2pt" color="green"/>
</fo:block>
Listing 19-6 uses fo:leader to
place a rule at the top of each page footer.
Listing 19-6 Using fo:leader to separate the footer from the body with a horizontal line
<?xml version="1.0"?>
<xsl:stylesheet version="1.0"
  xmlns:xsl="http://www.w3.org/1999/XSL/Transform"
  xmlns:fo="http://www.w3.org/1999/XSL/Format">

  <xsl:template match="/">
    <fo:root xmlns:fo="http://www.w3.org/1999/XSL/Format">

      <fo:layout-master-set>

        <fo:simple-page-master master-name="A4"
           page-width="297mm"  page-height="210mm"
           margin-top="0.5in"  margin-bottom="0.5in"
           margin-left="0.5in" margin-right="0.5in">
          <fo:region-before extent="1.0in"/>
          <fo:region-body margin-top="1.0in"
                          margin-bottom="1.0in"/>
          <fo:region-after  extent="1.0in"/>
        </fo:simple-page-master>

      </fo:layout-master-set>

      <fo:page-sequence master-reference`="A4"
        initial-page-number="1" language="en" country="us">

        <fo:static-content flow-name="xsl-region-before">
          <fo:block>The Periodic Table</fo:block>
        </fo:static-content>

        <fo:static-content flow-name="xsl-region-after">
          <fo:block><fo:leader leader-pattern="rule"
                               leader-length="18cm" />
          </fo:block>
          <fo:block>p. <fo:page-number/></fo:block>
        </fo:static-content>

        <fo:flow flow-name="xsl-region-body">
          <xsl:apply-templates select="//ATOM"/>
        </fo:flow>

      </fo:page-sequence>

    </fo:root>
  </xsl:template>

  <xsl:template match="ATOM">
    <fo:block><xsl:value-of select="NAME"/></fo:block>
  </xsl:template>

</xsl:stylesheet>
Figure 19-6 shows the third page of the PDF file generated from Listing 19-6. The rule appears at the bottom of this and every other page in the document.
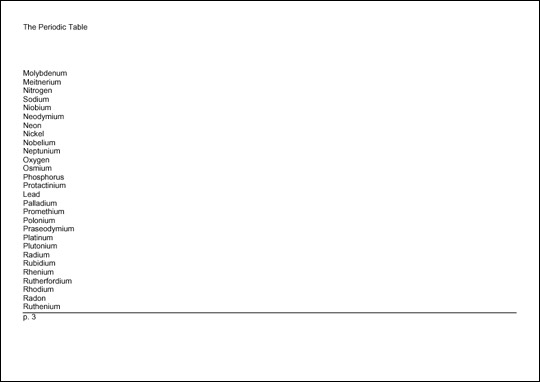
Figure 19-6: Automatically generated rules in the footer
XSL-FO
provides two elements for embedding pictures in a rendered document.
The fo:external-graphic element inserts a non-XML
graphic, such as a JPEG image. The fo:instream-foreign-object
element inserts an XML document that is not an XSL-FO document, such
as an SVG picture or a MathML equation.
The
fo:external-graphic element provides the equivalent
of an HTML IMG element. That is, it loads an image,
probably in a non-XML format, from a URL. fo:external-graphic
is always an empty element with no children. The src
attribute contains a URI identifying the location of the image to be
embedded. For example, consider this standard HTML IMG
element:
<IMG SRC="cup.gif">
The fo:external-graphic
equivalent looks like this:
<fo:external-graphic src="cup.gif"/>
Of course, you can use an absolute URL if you like:
<fo:external-graphic
     src="http://www.cafeconleche.org/cup.gif"/>
Just as with Web browsers and HTML, there's no guarantee that any particular formatting engine recognizes and supports any particular graphic format. Currently, FOP supports GIF, JPEG, and SVG images. PNG is supported if you have Sun's JIMI library installed. More formats may be added in the future.
fo:external-graphic
is an inline element. You can make it a block-level picture simply by
wrapping it in a fo:block element like this:
<fo:block><fo:external-graphic src="cup.gif"/></fo:block>
Listing 19-7 shows a style sheet that loads the
image at http://www.cafeconleche.org/images/atom.jpg
and puts it in the header of all the pages. In this case, the URI of
the image is hard coded in the style sheet. In general, however, it
would be read from the input document.
Listing 19-7 An XSL style sheet that references an external graphic
<?xml version="1.0"?>
<xsl:stylesheet version="1.0"
  xmlns:xsl="http://www.w3.org/1999/XSL/Transform"
  xmlns:fo="http://www.w3.org/1999/XSL/Format">

  <xsl:template match="/">
    <fo:root xmlns:fo="http://www.w3.org/1999/XSL/Format">

      <fo:layout-master-set>

        <fo:simple-page-master master-name="A4"
           page-width="297mm"  page-height="210mm"
           margin-top="0.5in"  margin-bottom="0.5in"
           margin-left="0.5in" margin-right="0.5in">
          <fo:region-before extent="1.0in"/>
          <fo:region-body margin-top="1.0in"
                          margin-bottom="1.0in"/>
          <fo:region-after  extent="1.0in"/>
        </fo:simple-page-master>

      </fo:layout-master-set>

      <fo:page-sequence master-reference="A4"
        initial-page-number="1" language="en" country="us">

        <fo:static-content flow-name="xsl-region-before">
          <fo:block>
            <fo:external-graphic
              src="http://www.cafeconleche.org/images/atom.jpg"
             />
            The Periodic Table
          </fo:block>
        </fo:static-content>

        <fo:static-content flow-name="xsl-region-after">
          <fo:block>
            <fo:leader leader-pattern="rule"
                       leader-length="18cm"/>
          </fo:block>
          <fo:block>p. <fo:page-number/></fo:block>
        </fo:static-content>

        <fo:flow flow-name="xsl-region-body">
          <xsl:apply-templates select="//ATOM"/>
        </fo:flow>

      </fo:page-sequence>

    </fo:root>
  </xsl:template>

  <xsl:template match="ATOM">
    <fo:block><xsl:value-of select="NAME"/></fo:block>
  </xsl:template>

</xsl:stylesheet>
Figure 19-7 shows the first page of the PDF file generated from Listing 19-7. The picture appears at the top of this and every other page in the document.
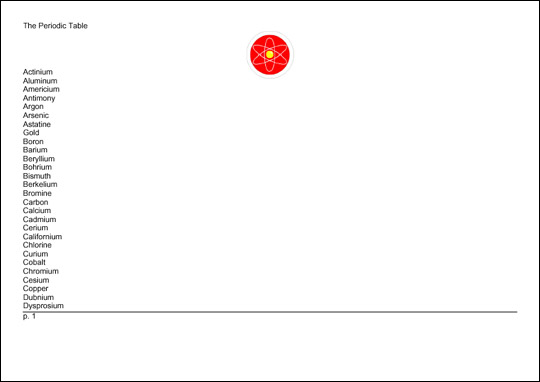
Figure 19-7: Inserting an external graphic in the header
The
fo:instream-foreign-object inserts a graphic element
that is described in XML and that is included directly in the XSL-FO
document. For example, a fo:instream-foreign-object
element might contain an SVG picture. The formatter would render the
picture in the finished document. Listing 19-8 is an XSL-FO document
that places the pink triangle SVG example from Chapter 2 on the
header of each page:
Listing 19-8 An XSL style sheet that contains an instream SVG picture
<?xml version="1.0"?>
<xsl:stylesheet version="1.0"
  xmlns:xsl="http://www.w3.org/1999/XSL/Transform"
  xmlns:fo="http://www.w3.org/1999/XSL/Format">

  <xsl:template match="/">
    <fo:root xmlns:fo="http://www.w3.org/1999/XSL/Format">

      <fo:layout-master-set>

        <fo:simple-page-master master-name="A4"
           page-width="297mm"  page-height="210mm"
           margin-top="0.5in"  margin-bottom="0.5in"
           margin-left="0.5in" margin-right="0.5in">
          <fo:region-before extent="1.0in"/>
          <fo:region-body   margin-top="1.0in"/>
        </fo:simple-page-master>

      </fo:layout-master-set>

      <fo:page-sequence master-reference="A4"
        initial-page-number="1" language="en" country="us">

        <fo:static-content flow-name="xsl-region-before">
          <fo:block> The Periodic Table
            <fo:instream-foreign-object>
              <svg xmlns="http://www.w3.org/2000/svg"
                 width="1.5cm" height="1cm">
       <polygon style="fill:#FFCCCC" points="0,31 18,0 36,31"/>
              </svg>
            </fo:instream-foreign-object>
          </fo:block>
        </fo:static-content>

        <fo:flow flow-name="xsl-region-body">
          <xsl:apply-templates select="//ATOM"/>
        </fo:flow>

      </fo:page-sequence>

    </fo:root>
  </xsl:template>

  <xsl:template match="ATOM">
    <fo:block><xsl:value-of select="NAME"/></fo:block>
  </xsl:template>

</xsl:stylesheet>
Figure 19-8 shows the first page of the PDF file generated from Listing 19-8. The triangle appears at the top of this and every other page in the document.

Figure 19-8: Embedding an instream graphic in the header
Not all formatters support all possible XML graphics formats. For instance, FOP does not support MathML at all, and only supports a subset of SVG. Still this is a useful technique, especially when you want XSLT to generate pictures at runtime. For instance, you could write an XSLT style sheet that produced nicely formatted annual reports, including all the charts and graphics, simply by transforming some of the input document into XSL-FO and other parts of the input document into SVG.
fo:external-graphic
and fo:instream-foreign-object share a number of
properties designed to scale, position, crop, align, and otherwise
adjust the appearance of the image on the page.
The
content-type attribute specifies the type of the
graphic. You can give this as a MIME media type, such as image/jpg or
image/svg+xml, by prefixing the actual type with content-type:.
For example, to specify that the fo:external-graphic
element refers to a GIF image you would write it as
<fo:external-graphic content-type="content-type:image/gif"
                     src="cup.gif" />
This can also be given in terms of a namespace
prefix by using a value in the form namespace-prefix:prefix.
For example, to specify that the fo:instream-foreign-object
includes an SVG picture you write it as
<fo:instream-foreign-object
   xmlns:svg="http://www.w3.org/2000/svg"
   content-type="namespace-prefix:svg">
The namespace prefix does not have to be
declared on the fo:instream-foreign-object element.
It simply needs to be declared somewhere in the ancestors of the
element.
The
height and width attributes specify
the vertical and horizontal size of the rectangle set aside on the
page for the image. Either or both of these can be set to the keyword
auto, rather than to an absolute length, to indicate
that the size of the image itself should be used.
The
content-height and content-width
attributes specify the vertical and horizontal size of the image
itself. If either or both of these is not the same as height
and width, respectively, then the image has to be
scaled.
The
scaling attribute can be set to either uniform
or non-uniform. Uniform scaling maintains the
height-to-width ratio of the image as it's scaled. This is the
default. Non-uniform scaling may scale the height and width
differently, so that the image is distorted.
You
can also choose the algorithm by which scaling occurs by using the
scaling-method attribute. This can be set to auto,
integer-pixels, or resample-any-method.
Integer scaling maintains an integral ratio between original and
scaled images such as 2:1 or 3:1, but not 1.5:1. In most cases,
integer-scaled images are smaller than images scaled by
resample-any-method, but won’t require
dithering. The value auto lets the formatter decide
what to do.
In
addition, you can set a variety of common properties for inline
elements. These include the common accessibility, aural, background,
border, padding, and margin properties. Because graphics shouldn't be
split across multiple pages, they don’t support the usual break
properties, but they do support keep-with-next and
keep-with-previous.
The
fo:basic-link element encodes HTML-style hyperlinks
in XSL-FO documents. This is an inline formatting object that the
user can click on to move to a different document, or to a different
place in the same document. This doesn’t offer much for print,
but it might be useful when and if Web browsers support XSL-FO
directly. The link behavior is controlled by these eight attributes:
external-destination
internal-destination
indicate-destination
show-destination
destination-placement-offset
target-presentation-context
target-processing-context
target-stylesheet
A
link to a remote document target specifies the URI through the value
of the external-destination attribute. The browser
should replace the current document with the document at this URI
when the reader activates the link. In most GUI environments, the
user activates the link by clicking on its contents. For example:
<fo:block> Be sure to visit the
   <fo:basic-link
     external-destination="http://www.cafeconleche.org/">
      Cafe con Leche Web site!
   </fo:basic-link>
</fo:block>
You can also link to another node in the same
document by using the internal-destination
attribute. The value of this attribute is not a URI, but rather the
ID of the element you're linking to. You can often use the
generate-id() function of XSLT to produce both the
IDs on the output elements and the links to those elements inside the
XSL-FO output. You should not specify both the internal and external
destination for one link.
The
three other destination attributes affect the appearance and behavior
of the link. The indicate-destination attribute has
a boolean value (true or false;
false by default) that specifies whether, when the
linked item is loaded, it should somehow be distinguished from
non-linked parts of the same document. For example, if you
follow a link to one ATOM element in a table of 100
atoms, the specific atom you were connecting to might be in boldface
while the other atoms are in normal type. The exact details are
system dependent.
The
show-destination attribute has two possible values:
replace (the default) and new. With
a value of replace, when a link is followed, the
target document replaces the existing document in the same window.
With a value of new, when the user activates a link,
the browser opens a new window in which to display the target
document.
When
a browser follows an HTML link into the middle of a document,
generally the specific linked element is positioned at the tip-top of
the window. The destination-placement-offset
attribute specifies how far down the browser should scroll the linked
element in the window. It's given as a length such as 3in
or 156px.
The
three target properties describe how the document at the other end of
the link will be displayed. The target-presentation-context
attribute contains a URI that generally indicates some subset of the
external destination that should actually be presented to the user.
For instance, an XPointer could be used here to say that although an
entire book is loaded only the seventh chapter will be shown.
The
target-processing-context attribute contains a URI
that serves as a base URI in the event that the external destination
contains a relative URI. Otherwise, that would be considered relative
to the current document.
Finally,
the target-stylesheet attribute contains a URI that
points to a style sheet that should be used when the targeted
document is rendered. This overrides any style sheet that the
targeted document itself specifies, whether through an xml-stylesheet
processing instruction, a LINK element in HTML, or
an HTTP header.
In addition, the link may have the usual accessibility, margin, background, border, padding, and aural properties.
The
fo:list-block formatting object element describes a
block-level list element. (There are no inline lists.) A list may or
may not be bulleted, numbered, indented, or otherwise formatted. Each
fo:list-block element contains either a series of
fo:list-item elements or fo:list-item-label
fo:list-item-body pairs. (It cannot contain both.) A
fo:list-item must contain a fo:list-item-label
and a fo:list-item-body. The fo:list-item-label
contains the bullet, number, or other label for the list item as a
block level element. The fo:list-item-body contains
block-level elements holding the actual content of the list item. To
summarize, a fo:list-block contains fo:list-item
elements. Each fo:list-item contains a
fo:list-item-label and fo:list-item-body.
However, the fo:list-item elements can be omitted.
For example:
<fo:list-block>
  <fo:list-item>
     <fo:list-item-label><fo:block>*</fo:block>
     </fo:list-item-label>
    <fo:list-item-body>
      <fo:block>Actinium</fo:block>
    </fo:list-item-body>
  </fo:list-item>
  <fo:list-item>
     <fo:list-item-label><fo:block>*</fo:block>
     </fo:list-item-label>
    <fo:list-item-body>
      <fo:block>Aluminum</fo:block>
    </fo:list-item-body>
  </fo:list-item>
</fo:list-block>
Or, with the fo:list-item tags
removed:
<fo:list-block>
   <fo:list-item-label>
     <fo:block>*</fo:block>
   </fo:list-item-label>
   <fo:list-item-body>
     <fo:block>Actinium</fo:block>
   </fo:list-item-body>
   <fo:list-item-label>
     <fo:block>*</fo:block>
   </fo:list-item-label>
   <fo:list-item-body>
    <fo:block>Aluminum</fo:block>
   </fo:list-item-body>
</fo:list-block>
The
fo:list-block element has two special attributes
that control list formatting:
provisional-label-separation:
The distance between the list item label and the list item body,
given as a triplet of maximum;minimum;optimum, such as
2mm;0.5mm;1mm.
provisional-distance-between-starts:
The distance between the start edge of the list item label and the
start edge of the list item body.
fo:list-block
also has the usual accessibility, aural, border, padding, background,
margin, and keeps and breaks properties. The fo:list-item
element has the standard block-level properties for backgrounds,
position, aural rendering, borders, padding, margins, line and page
breaking. The fo:list-item-label and
fo:list-item-body elements only have the
accessibility properties: id and keep-together.
The rest of their formatting is controlled either by the parent
elements (fo:list-item and fo:list-item-block)
or the child elements they contain.
Listing 19-9 formats the periodic table as a list in which the atomic numbers are the list labels and the names of the elements are the list bodies. Figure 19-9 shows the second page of output produced by this style sheet.
Listing 19-9 An XSL style sheet that formats the periodic table as a list
<?xml version="1.0"?>
<xsl:stylesheet version="1.0"
  xmlns:xsl="http://www.w3.org/1999/XSL/Transform"
  xmlns:fo="http://www.w3.org/1999/XSL/Format">

  <xsl:template match="/">
    <fo:root xmlns:fo="http://www.w3.org/1999/XSL/Format">

      <fo:layout-master-set>

        <fo:simple-page-master master-name="A4"
           page-width="297mm"  page-height="210mm"
           margin-top="0.5in"  margin-bottom="0.5in"
           margin-left="0.5in" margin-right="0.5in">
          <fo:region-body/>
        </fo:simple-page-master>

      </fo:layout-master-set>

      <fo:page-sequence master-reference="A4">

        <fo:flow flow-name="xsl-region-body">
          <fo:list-block>
            <xsl:apply-templates select="//ATOM">
              <xsl:sort data-type="number"
                        select="ATOMIC_NUMBER"/>
            </xsl:apply-templates>
          </fo:list-block>
        </fo:flow>

      </fo:page-sequence>

    </fo:root>
  </xsl:template>

  <xsl:template match="ATOM">
    <fo:list-item>
      <fo:list-item-label><fo:block>
         <xsl:value-of select="ATOMIC_NUMBER"/>
      </fo:block></fo:list-item-label>
      <fo:list-item-body><fo:block>
        <xsl:value-of select="NAME"/>
      </fo:block></fo:list-item-body>
    </fo:list-item>
  </xsl:template>

</xsl:stylesheet>
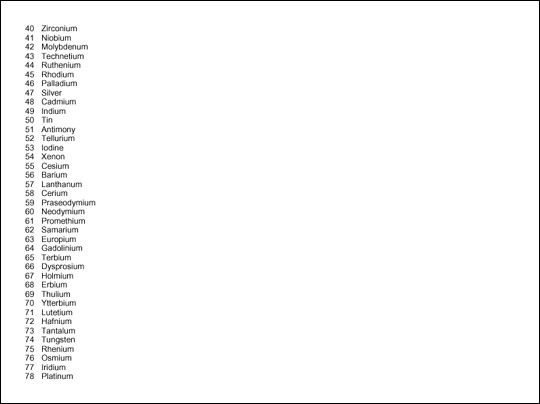
Figure 19-9: The periodic table formatted as a list
In
HTML a list item implies a certain level of indenting. However, as
you can see in Figure 19-9, no such indenting is implied by any of
the XSL-FO list elements. If you want list items to be indented, you
can use the start-indent and end-indent
attributes on the fo:list-item-label and
fo:list-item-body elements. Each of these is set to
a length. However, because the list item body normally starts on the
same line as the list item label, its start indent is often given by
the special XSL-FO body-start() function. This
returns the combined length of the start-indent and
the provisional-distance-between-starts. For
example,
<xsl:template match="ATOM">
  <fo:list-item>
    <fo:list-item-label start-indent="1.0cm"
                        end-indent="1.0cm">
      <fo:block>
        <xsl:value-of select="ATOMIC_NUMBER"/>
       </fo:block>
    </fo:list-item-label>
    <fo:list-item-body start-indent="body-start()">
      <fo:block>
        <xsl:value-of select="NAME"/>
      </fo:block>
    </fo:list-item-body>
  </fo:list-item>
</xsl:template>
The
fundamental table element in XSL is fo:table-and-caption.
This is a block-level object that contains a fo:table
and a fo:caption. If your table doesn’t need a
caption, you can just use a raw fo:table instead.
The XSL-FO table model is quite close to HTML's table model. Table
19-1 shows the mapping between HTML 4.0 table elements and XSL
formatting objects:
Table 19-1
HTML Tables vs. XSL Formatting Object Tables
|
HTML Element |
XSL FO Element |
|
|
|
|
no equivalent |
|
|
|
|
|
|
|
|
|
no equivalent |
|
|
|
|
|
|
|
|
|
|
|
|
|
|
|
Each
fo:table-and-caption contains an optional
fo:table-caption element and one fo:table
element. The caption can contain any block-level elements you care to
place in the caption. By default captions are placed before the
table, but this can be adjusted by setting the caption-side
property of the table-and-caption element to one of
these eight values:
before
after
start
end
top
bottom
left
right
For example, here's a table with a caption on the bottom:
<fo:table-and-caption caption-side="bottom">
  <fo:table-caption>
    <fo:block font-weight="bold"
              font-family="Helvetica, Arial, sans"
              font-size="12pt">
      Table 19-1: HTML Tables vs. XSL Formatting Object Tables
    </fo:block>
  </fo:table-caption>
  <fo:table>
    <!-- table contents go here -->
  </fo:table>
</fo:table-and-caption>
The fo:table element contains
fo:table-column elements, an optional
fo:table-header, an optional fo:table-footer,
and one or more fo:table-body elements. The
fo:table-body is divided into fo:table-row
elements. Each fo:table-row is divided into
fo:table-cell elements. The fo:table-header
and fo:table-footer can either be divided into
fo:table-cell or fo:table-row
elements. For example, here's a simple table that includes the first
three rows of Table 19-1 above.
<fo:table>
  <fo:table-header>
    <fo:table-cell>
      <fo:block font-family="Helvetica, Arial, sans"
                font-size="11pt" font-weight="bold">
        HTML Element
      </fo:block>
    </fo:table-cell>
    <fo:table-cell>
      <fo:block font-family="Helvetica, Arial, sans"
                font-size="11pt" font-weight="bold">
        XSL FO Element
      </fo:block>
    </fo:table-cell>
  </fo:table-header>
  <fo:table-body>
    <fo:table-row>
      <fo:table-cell>
        <fo:block font-family="Courier, monospace">
          TABLE
        </fo:block>
      </fo:table-cell>
      <fo:table-cell>
        <fo:block font-family="Courier, monospace">
          fo:table-and-caption
        </fo:block>
      </fo:table-cell>
    </fo:table-row>
    <fo:table-row>
      <fo:table-cell>
        <fo:block>no equivalent</fo:block>
      </fo:table-cell>
      <fo:table-cell>
        <fo:block font-family="Courier, monospace">
          fo:table
        </fo:block>
      </fo:table-cell>
    </fo:table-row>
  </fo:table-body>
</fo:table>
You can make table cells span multiple rows and
columns by setting the number-columns-spanned and/or
number-rows-spanned attributes to an integer giving
the number of rows or columns to span. The optional column-number
attribute can change which column the spanning begins in. The default
is the current column.
Borders
can be drawn around table parts using the normal border properties.
The empty-cells attribute has the value show
or hide; show if borders are to be
drawn around cells with no content, hide if not. The
default is show.
When
a long table extends across multiple pages, sometimes the header and
footer are repeated on each page. You can alter this behavior with
the table-omit-header-at-break and
table-omit-footer-at-break attributes of the
fo:table element. The value false
indicates that the header or footer is to be repeated from page to
page. The value true indicates that it is not. The
default is false.
The
optional fo:table-column element is an empty element
that specifies properties for all cells in a particular column. The
cells it applies to are identified by the column-number
attribute or by the position of the fo:table-column
element itself. fo:table-column does not actually
contain any cells. A fo:table-column can apply
properties to more than one consecutive column by setting the
number-columns-spanned property to an integer
greater than one. The most common property to set in a
fo:table-column is column-width (a
signed length) but the standard border, padding, and background
properties (discussed below and mostly the same as in CSS) can also
be set.
Caution
FOP 0.20.4 has
limited table support. In particular, it does not support
fo:table-caption or fo:table-and-caption.
Furthermore, FOP requires you to explicitly specify the column widths
using a fo:table-column element. You can't let it
choose suitable widths as you might let a Web browser do.
For example, Listing 19-10 lays out all the properties of the elements in a table. Figure 19-10 shows the first page of output produced by this style sheet.
Listing 19-10 An XSL style sheet that formats the elements as a table
<?xml version="1.0"?>
<xsl:stylesheet version="1.0"
  xmlns:xsl="http://www.w3.org/1999/XSL/Transform"
  xmlns:fo="http://www.w3.org/1999/XSL/Format">

  <xsl:template match="/">
    <fo:root xmlns:fo="http://www.w3.org/1999/XSL/Format">

      <fo:layout-master-set>

        <fo:simple-page-master master-name="A4"
           page-width="297mm"  page-height="210mm"
           margin-top="0.5in"  margin-bottom="0.5in"
           margin-left="0.5in" margin-right="0.5in">
          <fo:region-body/>
        </fo:simple-page-master>

      </fo:layout-master-set>

      <fo:page-sequence master-reference="A4">

        <fo:flow flow-name="xsl-region-body">
          <fo:table>
            <fo:table-column column-width="30mm"/>
            <fo:table-column column-width="12mm"/>
            <fo:table-column column-width="12mm"/>
            <fo:table-column column-width="25mm"/>
            <fo:table-column column-width="27mm"/>
            <fo:table-column column-width="18mm"/>
            <fo:table-column column-width="49mm"/>
            <fo:table-column column-width="16mm"/>
            <fo:table-column column-width="16mm"/>
            <fo:table-column column-width="16mm"/>
            <fo:table-column column-width="21mm"/>
            <fo:table-column column-width="21mm"/>
            <fo:table-column column-width="21mm"/>
            <fo:table-body>
              <xsl:apply-templates select="//ATOM">
                <xsl:sort data-type="number"
                  select="ATOMIC_NUMBER"/>
              </xsl:apply-templates>
            </fo:table-body>
          </fo:table>
        </fo:flow>

      </fo:page-sequence>

    </fo:root>
  </xsl:template>

  <xsl:template match="ATOM">
    <fo:table-row>
      <fo:table-cell>
        <fo:block><xsl:value-of select="NAME"/></fo:block>
      </fo:table-cell>
      <fo:table-cell>
        <fo:block><xsl:value-of select="SYMBOL"/></fo:block>
      </fo:table-cell>
      <fo:table-cell>
        <fo:block>
          <xsl:value-of select="ATOMIC_NUMBER"/>
        </fo:block>
      </fo:table-cell>
      <fo:table-cell>
        <fo:block>
          <xsl:value-of select="ATOMIC_WEIGHT"/>
        </fo:block>
      </fo:table-cell>
      <fo:table-cell>
        <fo:block>
          <xsl:value-of select="OXIDATION_STATES"/>
        </fo:block>
      </fo:table-cell>
      <fo:table-cell>
        <fo:block><xsl:value-of select="DENSITY"/></fo:block>
      </fo:table-cell>
      <fo:table-cell>
        <fo:block>
          <xsl:value-of select="ELECTRON_CONFIGURATION"/>
        </fo:block>
      </fo:table-cell>
      <fo:table-cell>
        <fo:block>
          <xsl:value-of select="ELECTRONEGATIVITY"/>
        </fo:block>
      </fo:table-cell>
      <fo:table-cell>
        <fo:block>
          <xsl:value-of select="ATOMIC_RADIUS"/>
        </fo:block>
      </fo:table-cell>
      <fo:table-cell>
        <fo:block>
          <xsl:value-of select="ATOMIC_VOLUME"/>
        </fo:block>
      </fo:table-cell>
      <fo:table-cell>
        <fo:block>
          <xsl:value-of select="SPECIFIC_HEAT_CAPACITY"/>
        </fo:block>
      </fo:table-cell>
      <fo:table-cell>
        <fo:block>
          <xsl:value-of select="SPECIFIC_HEAT_CAPACITY"/>
        </fo:block>
      </fo:table-cell>
      <fo:table-cell>
        <fo:block>
          <xsl:value-of select="THERMAL_CONDUCTIVITY"/>
        </fo:block>
      </fo:table-cell>
    </fo:table-row>
  </xsl:template>

</xsl:stylesheet>

Figure 19-10: The periodic table formatted as a table
The
fo:inline element has no particular effect on the
layout of the page. Rather it's an element on which you can hang
formatting attributes such as font-style or color
for application to the inline's contents. The fo:inline
formatting object is a container that groups inline objects together.
It cannot contain block-level elements. For example, you can use
fo:inline elements to add style to various parts of
the footer, like this:
<fo:static-content flow-name="xsl-region-after">
  <fo:block font-weight="bold" font-size="10pt"
            font-family="Arial, Helvetica, sans">
     <fo:inline font-style="italic" text-align="start">
       The XML Bible
     </fo:inline>
     <fo:inline text-align="centered">
       Page <fo:page-number/>
     </fo:inline>
     <fo:inline text-align="right">
       Chapter 19: XSL Formatting Objects
     </fo:inline>
  </fo:block>
</fo:static-content>
The
fo:footnote element creates a footnote. The author
places the fo:footnote element in the flow exactly
where the footnote reference such as 1 or *
will occur. The fo:footnote element contains both
the reference text and a fo:footnote-body
block-level element containing the text of the footnote. However,
only the footnote reference is inserted inline. The formatter places
the note text in the after region (generally the footer) of the page.
For
example, this footnote uses an asterisk as a footnote marker and
refers to "JavaBeans, Elliotte Rusty Harold
(IDG Books, Foster City, 1998), p. 147". Standard
properties such as font-size
and vertical-align are used to
format both the note marker and the text in the customary fashion.
<fo:footnote>
  <fo:inline font-size="smaller" vertical-align="super">*
  </fo:inline>
  <fo:footnote-body font-size="smaller">
    <fo:inline font-size="smaller" vertical-align="super">
       *
    </fo:inline>
    <fo:inline font-style="italic">JavaBeans</fo:inline>,
      Elliotte Rusty Harold
      (IDG Books, Foster City, 1998), p. 147
  </fo:footnote-body>
</fo:footnote>
Tip
XSL-FO doesn't
provide any means of automatically numbering and citing footnotes,
but this can be done by judicious use of xsl:number
in the transformation style sheet. XSL Transformations make end notes
easy as well.
A
fo:float produces a floating box anchored to the top
of the region where it occurs. A fo:float is most
commonly used for graphics, charts, tables or other out-of-line
content that needs to appear somewhere on the page, although
precisely where it appears is not particularly important. For
example, this fo:block includes a floating graphic
with a caption:
<fo:block>
  Although PDF files are themselves ASCII text,
  this isn't a book about PostScript, so there's
  nothing to be gained by showing you the exact
  output of the above command. If you're curious,
  open the PDF file in any text editor.
  Instead, Figure 19-1
  <fo:float float="before">
    <fo:external-graphic src="4760-7fg1901.jpg"
                         height="485px" width="623px" />
    <fo:block font-family="Helvetica, sans">
      <fo:inline font-weight="bold">
        Figure 19-1:
      </fo:inline>
      The PDF file displayed in Netscape Navigator
    </fo:block>
  </fo:float>
  shows the rendered file displayed in
  Netscape Navigator using the Acrobat plug-in.
</fo:block>
The formatter tries to place the graphic
somewhere on the same page where the content surrounding the fo:float
appears. However, it may not always be able to find room on that
page. If it can’t, it moves the object to a subsequent page.
Within those limits, it's free to place it anywhere on the page.
The
value of the float attribute indicates on which side
of the page the fo:float floats. It can be set to
before, start, end,
left, right, none,
or inherit.
The
clear attribute can be set on elements near the
floating object to indicate whether they'll flow around the side of
the float or whether they'll move below the float. It can have the
values start (the start edge of the object must not
be adjacent to a floating object), end (the end edge
of the object must not be adjacent to a floating object), left
(the left edge of the object must not be adjacent to a floating
object), right (the right edge of the object must
not be adjacent to a floating object), both (neither
the left nor the right edge of the object may be adjacent to a
floating object), none, or inherit.
Caution
FOP 0.20.4 does
not support the fo:float formatting object.
By themselves, formatting objects say relatively little about how content is formatted. They merely put content in abstract boxes, which are placed in particular parts of a page. Attributes on the various formatting objects determine how the content in those boxes is styled.
As
already mentioned, there are more than 200 different formatting
properties. Not all properties can be attached to all elements. For
instance, there isn’t much point to specifying the font-style
of a fo:external-graphic. Most properties, however,
can be applied to more than one kind of formatting object element.
(The few that can’t, such as src and
provisional-label-separation, were discussed above
with the formatting objects they apply to.) When a property is common
to multiple formatting objects, it shares the same syntax and meaning
across the objects. For example, you use identical code to format a
fo:title in 14-point Times bold as you do to format
a fo:block in 14-point Times bold.
Many
of the XSL-FO properties are similar to CSS properties. The value of
a CSS font-family property is the same as the value
of an XSL-FO font-family attribute. If you’ve
read about CSS in Chapters 14 through 16, you’re already more
than half finished learning XSL-FO properties.
The
id property can be applied to any element. This is
an XML ID-type attribute. The value of this property must, therefore,
be an XML name that’s unique within the style sheet and within
the output formatting object document. The last requirement is a
little tricky because it's possible that one template rule in the
style sheet may generate several hundred elements in the output
document. The generate-id() function of XSLT can be
useful here.
The
language property specifies the language of the
content contained in either a fo:block or a
fo:character element. Generally, the value of this
property is an ISO 639 language code such as en
(English) or la (Latin). It may also be the keyword
none or use-document. The latter
means to simply use the language of the input as specified by the
xml:lang attribute. For example, consider the first
verse of Caesar’s Gallic Wars:
<fo:block id="verse1.1.1" language="la">
  Gallia est omnis divisa in partes tres,
  quarum unam incolunt Belgae, aliam Aquitani,
  tertiam qui ipsorum lingua Celtae, nostra Galli appellantur
</fo:block>
Although the language property
has no direct effect on formatting, it may have an indirect effect if
the formatter selects layout algorithms depending on the language.
For instance, the formatter should use different default writing
modes for Arabic and English text. This carries over into
determination of the start and end regions and the inline and block
progression directions.
Paragraph properties are styles that normally are thought of as applying to an entire block of text in a traditional word processor, although perhaps block-level text properties is a more appropriate name here. For example, indentation is a paragraph property, because you can indent a paragraph, but you can’t indent a single word.
The break properties specify where page breaks are and are not allowed. There are seven loosely related break properties:
keep-with-next
keep-with-previous
keep-together
break-before
break-after
The
keep-with-next property determines how much effort
the formatter will expend to keep this formatting object on the same
page as the following formatting object. The keep-with-previous
property determines how much effort the formatter will expend to keep
this formatting object on the same page as the preceding formatting
object. And the keep-together property determines
how much effort the formatter will expend to keep the contents of
this formatting object on one page. These are not hard and fast rules
because it's always possible that a formatting object is just too big
for one page. Each of these properties can be set to an integer
giving the strength of the effort to keep the objects on the same
page (larger integers are stronger) or to the keywords always
or auto. always means maximum
effort; auto means let the breaks fall where they
may.
By
contrast, the break-before property and break-after
properties mandate some kind of break. What exactly is broken is
determined by the value of the property. This can be one of these
five values:
column: Break the current
column and move to the next column.
page: Break the current page
and move to the next page.
even-page: Break the current
page and move to the next even-numbered page, inserting a blank page
if the current page is itself an even-numbered page.
odd-page: Break the current
page and move to the next odd-numbered page, inserting a blank page
if the current page is itself an odd-numbered page.
auto: Let the formatter
decide where to break; the default.
For
example, this template rule ensures that each ATOM
of sufficiently small size is printed on a page of its own:
<xsl:template match="ATOM">
  <fo:block break-before="page" break-after="page">
    <xsl:apply-templates/>
  </fo:block>
</xsl:template>
Finally, the inhibit-line-breaks
property is a boolean that can be set to true to
indicate that not even a line break is allowed, much less a page
break.
XSL-FO
also defines three shorthand page-break properties: page-break-after,
page-break-before, and page-break-inside.
These are not absolutely necessary because their effects can be
achieved by appropriate combinations of the keep and break
properties. For example, to specify a page break after an element,
you'd set break-before to page and
keep-with-previous to auto.
The hyphenation properties determine where hyphenation is allowed and how it should be used. These properties apply only to soft or “optional” hyphens such as the ones sometimes used to break long words at the end of a line. They do not apply to hard hyphens such as the ones in the word mother-in-law, although hard hyphens may affect where soft hyphens are allowed. There are six hyphenation properties. They are:
hyphenate: Automatic
hyphenation is allowed only if this property has the value true.
hyphenation-character: The
Unicode character used to hyphenate words, such as - in English.
hyphenation-keep: One of the
four keywords (column, none, page,
inherit) that specify where and whether hyphenation
is allowed. The default is not to hyphenate.
hyphenation-ladder-count: A
nonnegative integer that specifies the maximum number of hyphenated
lines that may appear in a row.
hyphenation-push-character-count:
A nonnegative integer that specifies the minimum number of characters
that must follow an automatically inserted hyphen. (Short syllables
look bad in isolation.)
hyphenation-remain-character-count:
A nonnegative integer specifying the minimum number of characters
that must precede an automatically inserted hyphen.
For example:
<fo:block hyphenate="true"
          hyphenation-character="-"
          hyphenation-keep="none"
          hyphenation-ladder-count="2"
          hyphenation-push-character-count="4"
          hyphenation-remain-character-count="4" >
  some content...
</fo:block>
XSL-FO does not specify a word-breaking algorithm to determine where a soft hyphen may be applied. Even when these properties allow hyphenation, it’s still completely up to the formatter to figure out how to hyphenate individual words. Indeed, basic formatters may not attempt to hyphenate words at all.
The indent properties specify how far lines are indented from the edge of the text. There are four of these:
start-indent
end-indent
text-indent
last-line-end-indent
The
start-indent property offsets all lines from the
start edge (left edge in English). The end-indent
property offsets all lines from the end edge (right edge in English).
The text-indent property offsets only the first line
from the start edge. The last-line-end-indent
property offsets only the last line from the start edge. Values are
given as a signed length. For example, a standard paragraph with a
half-inch, first-line indent might be formatted this way:
<fo:block text-indent="0.5in">
  The first line of this paragraph is indented
</fo:block>
A block quote with a one-inch indent on all lines on both sides is formatted like this:
<fo:block start-indent="1.0in" end-indent="1.0in">
  This text is offset one inch from both edges.
</fo:block>
Because the text-indent is
added to the start-indent to get the total
indentation of the first line, using a positive value for
start-indent and a negative value for text-indent
creates hanging indents. For example, all lines except the first in
this paragraph are indented by one inch. The first line is only
indented half an inch:
<fo:block text-indent="-0.5in" start-indent="1.0in">
  This paragraph uses a hanging indent.
</fo:block>
Character
properties describe the qualities of individual characters. They are
applied to elements that contain characters such as fo:block
and fo:list-item-body elements. These include color,
font, style, weight, and similar properties.
The
color property sets the foreground color of the
contents using the same syntax as the CSS color
property. For example, this fo:inline colors the
text “Lions and tigers and bears, oh my!” pink:
<fo:inline color="#FFCCCC">
  Lions and tigers and bears, oh my!
</fo:inline>
Colors are specified in much the same way as
they are in CSS; that is, as hexadecimal triples in the form #RRGGBB
or as one of the 16 named colors aqua, black,
blue, fuchsia, gray,
green, lime, maroon,
navy, olive, purple,
red, silver, teal,
white, and yellow.
Any formatting object that holds text can have a wide range of font properties. Most of these are familiar from CSS, including:
font-family: A list of font
names in order of preference
*font-size:
A signed length
font-size-adjust: The
preferred ratio between the x-height and size of a font, specified as
an unsigned real number or as none
font-stretch: The “width”
of a font, given as one of the keywords condensed,
expanded, extra-condensed,
extra-expanded, narrower, normal,
semi-condensed, semi-expanded,
ultra-condensed, ultra-expanded, or
wider
font-style: The style of
font specified as one of the keywords italic,
normal, oblique, reverse-normal,
or reverse-oblique
font-variant: Either normal
or small-caps
font-weight: The thickness
of the strokes that draw the font, given as one of the keywords 100,
200, 300, 400,
500, 600, 700,
800, 900, bold,
bolder, lighter, or normal
The text properties apply styles to text that are more or less independent of the font chosen. These include:
text-transform
text-shadow
text-decoration
score-spaces
The
text-transform property defines how text is
capitalized, and is identical to the CSS property of the same name.
The four possible values are:
none: Don’t change the
case (the default)
capitalize: Make the first
letter of each word uppercase and all subsequent letters lowercase
uppercase: Make all
characters uppercase
lowercase: Make all
characters lowercase
This property is somewhat language specific. (Chinese and Hebrew, for example, don't have separate upper and lower cases.) Formatters are free to ignore the case recommendations when they're applied to non-Roman text.
The
text-shadow property applies a shadow to text. This
is similar to a background color, but differs in that the shadow is
attached to the text itself rather than to the box containing the
text. The value of text-shadow can be the keyword
none or a named or RGB color. For example:
<fo:inline text-shadow="FFFF66">
  This sentence is yellow.
</fo:inline>
The text-decoration property
is similar to the CSS text-decoration property. Like
that property, it has these five possible values:
none: No decoration, the
default
underline: Underlining
overline: A line above the
text
line-through: Strike
through
blink: The notorious
blinking text introduced by Netscape
In addition to the five values that are familiar from CSS, XSL-FO also adds four values that turn off decoration that is simply inherited from a parent element:
no-underline
no-overline
no-line-through
no-blink
Scoring
is a catchall word for underlining, line-through,
double strike-through, and so forth. The score-space
property determines whether white space is scored. For example, if
score-spaces is true, an underlined
sentence looks like this. If score-spaces
is false, an underlined
sentence looks like this.
Sentence properties apply to groups of characters, that is, a property that makes sense only for more than one letter at a time, such as how much space to place between letters or words.
Kerning of text is a slippery measure of how much space separates two characters. It’s not an absolute number. Most formatters adjust the space between letters based on local necessity, especially in justified text. Furthermore, high-quality fonts use different amounts of space between different glyphs. However, you can make text looser or tighter overall.
The
letter-spacing property adds additional space
between each pair of glyphs, beyond that provided by the kerning.
It’s given as a signed length specifying the desired amount of
extra space to add. For example:
  <fo:block letter-spacing="2px">
    This is fairly loose text
  </fo:block>
The length may be negative to tighten up the text. Formatters, however, generally impose limits on how much extra space they allow to be added to or removed from the space between letters.
The
word-spacing property adjusts the amount of space
between words. Otherwise, it behaves much like the letter spacing
properties. The value is a signed length giving the amount of extra
space to add between two words. For example:
  <fo:block word-spacing="0.3cm">
    This is pretty loose text.
</fo:block>An XSL-FO formatting engine divides block areas into line areas. You cannot create line areas directly from XSL-FO. However, with these five properties you can affect how they’re vertically spaced:
line-height: The minimum
height of a line
line-height-shift-adjustment:
consider-shifts if subscripts and superscripts
should expand the height of a line; disregard-shifts
if they shouldn’t
line-stacking-strategy:
line-height (the CSS model and the default);
font-height (make the line as tall as the font
height after addition of text-altitude and
text-depth); or max-height
(distance between the maximum ascender height and maximum descender
depth)
text-depth: A signed length
specifying additional vertical space added after each line; can also
be the keyword use-font-metrics (the default) to
indicate that this depends on the font
text-altitude: A signed
length specifying the minimum additional vertical space added before
each line; can also be the keyword use-font-metrics
(the default) to indicate that this depends on the font
The line height also depends largely on the size of the font in which the line is drawn. Larger font sizes will naturally have taller lines. For example, the following opening paragraph from Mary Wollstonecraft’s A Vindication of the Rights of Woman is effectively double-spaced:
<fo:block font-size="12pt" line-height="24pt">
  In the present state of society it appears necessary to go
  back to first principles in search of the most simple truths,
  and to dispute with some prevailing prejudice every inch of
  ground. To clear my way, I must be allowed to ask some plain
  questions, and the answers will probably appear as
  unequivocal as the axioms on which reasoning is built;
  though, when entangled with various motives of action, they
  are formally contradicted, either by the words or conduct
  of men.
</fo:block>
The
text-align and text-align-last
properties specify how the inline content is horizontally aligned
within its box. The eight possible values are:
start: Left-aligned in
left-to-right languages like English
center: Centered
end: Right-aligned in
left-to-right scripts
justify: Expanded with extra
space as necessary to fill out the line
left: Align with the left
side of the page regardless of the writing direction
right: Align with the right
side of the page regardless of the writing direction
inside: Align with the
inside edge of the page; that is, the right edge on the left page of
two facing pages or the left edge on the right page of two facing
pages
outside: Align with the
outside edge of the page; that is, the left edge on the left page of
two facing pages or the right edge on the right page of two facing
pages
The
text-align-last property enables you to specify a
different value for the last line in a block. This is especially
important for justified text, where the last line often doesn’t
have enough words to be attractively justified. The possible values
are the same as for text-align plus relative.
A relatively aligned last line will line up the same way as all other
lines unless text-align is justified,
in which case the last line will align with the start edge instead.
The
space-treatment property specifies what the
formatting engine should do with white space that’s still
present after the original source document is transformed into
formatting objects. It can be set to either preserve
(the default) or ignore. If you set it to ignore,
leading and trailing white space will be thrown away.
The
white-space-collapse property can be set to true
(the default) or false. When true, runs of white
space are replaced by a single space. When false, they're left
unchanged.
The
wrap-option property determines how text that’s
too long to fit on a line is handled. This property can be set to
wrap (the default) or no-wrap. When
set to wrap, this allows the formatter to insert
line breaks as necessary to fit the text.
Area properties are applied to boxes. These may be either block-level or inline boxes. Each of these boxes has:
A background
Margins
Borders
Padding
A size
The background properties are identical to the CSS background properties. There are five:
The background-color
property specifies the color of the box’s background. Its value
is either a color such as red or #FFCCCC
or the keyword transparent.
The background-image
property gives the URI of an image to be used as a background. The
value can also be the keyword none.
The background-attachment
property specifies whether the background image is attached to the
window or the document. Its value is one of the two keywords fixed
or scroll.
The background-position
property specifies where the background image is placed in the box.
Possible values include center, left,
right, bottom, middle,
top, or a coordinate.
The background-repeat
property specifies how and whether a background image is tiled if it
is smaller than its box. Possible values include repeat,
no-repeat, repeat-x, and repeat-y. `
The
following block shows the use of the background-image,
background-position, background-repeat,
and background-color properties:
<fo:block background-image="/bg/paper.gif"
          background-position="0,0"
          background-repeat="repeat"
          background-color="white">
  Two strings walk into a bar...
</fo:block>
Caution
The only
background property FOP 0.20.4 supports is background-color.
The others will probably be added in future releases.
The
border properties describe the appearance of a border around the box.
They are mostly the same as the CSS border properties. However, as
well as border-XXX-bottom, border-XXX-top,
border-XXX-left, and border-XXX-right
properties, the XSL versions also have border-XXX-before,
border-XXX-after, border-XXX-start,
and border-XXX-end versions. There are 31
border properties in all. These are:
Color: border-color,
border-before-color, border-after-color,
border-start-color, border-end-color,
border-top-color, border-bottom-color,
border-left-color, and border-right-color.
The default color is black.
Width: border-width,
border-before-width, border-after-width,
border-start-width, border-end-width,
border-top-width, border-bottom-width,
border-left-width, and border-right-width.
The default width is medium.
Style: border-style,
border-before-style, border-after-style,
border-start-style, border-end-style,
border-top-style, border-bottom-style,
border-left-style, border-right-style. The
default style is none.
Shorthand properties: border,
border-top, border-bottom,
border-left, border-right,
border-color, border-style,
border-width.
For example, this block has a two-pixel-wide blue border:
<fo:block border-before-color="blue" border-before-width="2px"
          border-after-color="blue"  border-after-width="2px"
          border-start-color="blue"  border-start-width="2px"
          border-end-color="blue"    border-end-width="2px">
  You have been selected for Special High Intensity Training.
</fo:block>The
padding properties specify the amount of space between the border of
the box and the contents of the box. The border of the box, if shown,
falls between the margin and the padding. The padding properties are
mostly the same as the CSS padding properties. However, as well as
padding-bottom, padding-top,
padding-left, and padding-right,
the XSL-FO versions also have padding-before,
padding-after, padding-start, and
padding-end versions. Thus in total there are eight
padding properties, each of which has a signed length for a value.
These are:
padding-after
padding-before
padding-bottom
padding-end
padding-left
padding-start
padding-right
padding-top
For example, this block has half a centimeter of padding on each side:
<fo:block padding-before="0.5cm" padding-after="0.5cm"
          padding-start="0.5cm"  padding-end="0.5cm">
  Did you hear the one about the dyslexic agnostic?
</fo:block>There are five margin properties, each of whose values is given as an unsigned length. These are:
margin-top
margin-bottom
margin-left
margin-right
margin
However, these properties are only here for compatibility with CSS. In general, it's recommended that you use these four properties instead because they fit better in the XSL-FO formatting model:
space-before
space-after
start-indent
end-indent
The
space-before and space-after
properties are equivalent to the margin-top and
margin-bottom properties respectively. The
start-indent property is equivalent to the sum of
padding-left, border-left-width,
and margin-left. The end-indent
property is equivalent to the sum of padding-right,
border-right-width, and margin-right.
Figure 19-11 should make this clearer.
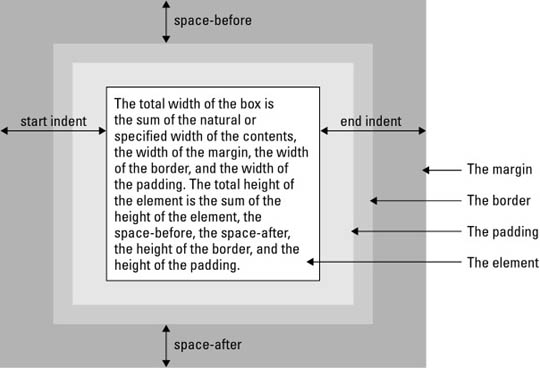
Figure 19-11: Padding, indents, borders, and space before and after for an XSL box
For example, this block has a half centimeter margin at its start and end sides:
<fo:block start-indent="0.5cm" end-indent="0.5cm">
  Two strings walk into a bar...
</fo:block>
However, unlike margins, space properties are given as space specifiers that contain more than one value. In particular, they contain a preferred value, a minimum value, a maximum value, a conditionality, and a precedence. This allows the formatter somewhat more freedom in laying out the page. The formatter is free to pick any amount of space between the minimum and maximum to fit the constraints of the page.
Each
of the space values is a length. The conditionality is one of the two
keywords discard or retain. This
determines what happens to extra space at the end of a line. The
default is to discard it. The precedence can either be an integer or
the keyword force. The precedence determines what
happens when the space-end of one inline area
conflicts with the space-start of the next. The area
with higher precedence wins. The default precedence is 0. Semicolons
separate all five values.
For
example, consider this fo:block element:
<fo:block space-before="0in;0.5in;0.166in;discard;force">
 It goes to 11.
</fo:block>
It says that ideally the formatter should add a
sixth of an inch of space before this element. However, it can add as
little as no space at all and as much as half an inch if necessary.
Because the precedence is set to force, this will
override any other space specifiers that conflict with it. Finally,
if there's any extra space that's left over at the end, it will be
discarded.
Two margin properties apply only to inline elements:
space-end
space-start
Their values are space specifiers that give a range of extra space to be added before and after the element. The actual spaces may be smaller or larger. Because the space is not part of the box itself, one box’s end space can be part of the next box’s start space.
Six properties specify the height and width of the content area of a box. These are:
height
width
max-height
max-width
min-height
min-width
These
properties do not specify the total width and height of the box,
which also includes the margins, padding, and borders. This is only
the width and height of the content area. As well as an unsigned
length, the height and width
properties may be set to the keyword auto, which
chooses the height and width based on the amount of content in the
box. However, in no case are the height and width larger than the
values specified by the max-height and max-width
or smaller than the min-height and min-width.
For example:
<fo:block height="2in" width="2in">
  Two strings walk into a bar...
</fo:block>
The
overflow property determines what happens when
there’s too much content to fit within a box of a specified
size. This may be an explicit specification using the size properties
or an implicit specification based on page size or other constraints.
There are four possibilities, each of which is represented by a
keyword:
auto: Use scrollbars if
there is overflow; don’t use them if there isn’t. If
scroll bars aren’t available (for example, on a printed page)
then add a new page for flow content and generate an error for static
content. This is the default.
hidden: Don’t show any
content that runs outside the box.
scroll: Attach scroll bars
to the box so the reader can scroll to the additional content.
visible: The complete
contents are shown; if necessary, by overriding the size constraints
on the box.
error-if-overflow: The
formatter should give up and display an error message if content
overflows its box.
paginate: If the object
overflowed is a page, then create a new page to hold the excess
content.
The
clip property specifies the shape of the clipping
region if the overflow property does not have the
value visible. The default clipping region is simply
the box itself. However, you can change this by specifying a
particular rectangle like this:
clip=rect(top_offset right_offset bottom_offset left_offset)
Here top_offset,
right_offset, bottom_offset,
and left_offset are signed lengths giving the
offsets of the clipping region from the top, right, bottom, and left
sides of the box. This allows you to make the clipping region larger
or smaller than the box itself.
The
reference-orientation property allows you to specify
that the content of a box is rotated relative to its normal
orientation. The only valid values are 90-degree increments, which
are measured counterclockwise, that is 0, 90,
180, and 270. You can also specify
-90, -180, and -270.
For example, here's a 90-degree rotation:
<fo:block reference-orientation="90">
  Bottom to Top
</fo:block>
The writing mode specifies the direction of text in the box. This has important implications for the ordering of formatting objects in the box. Most of the time, speakers of English and other Western languages assume a left-to-right, top-to-bottom writing mode, such as this:
A B C D E F G
H I J K L M N
O P Q R S T U
V W X Y Z
However, in the Hebrew and Arabic-speaking worlds, a right-to-left, top-to-bottom ordering such as this one seems more natural:
G F E D C B A
N M L K J I H
U T S R Q P O
Z Y X W V
In Taiwan, a top-to-bottom, left-to-right order is conventional:
A E I M Q U Y
B F J N R V Z
C G K O S W
D H L P T X
In XSL-FO, the writing mode doesn’t just affect text. It also affects how objects in a flow or sequence are laid out, how wrapping is performed, and more. You’ve already noticed that many properties are organized in start, end, before, and after variations instead of left, right, top, and bottom. Specifying style rules in terms of start, end, before, and after, instead of left, right, top, and bottom, produces more robust, localizable style sheets.
The
writing-mode property specifies the writing mode for
an area. This property can have 1 of 13 keyword values. These are:
bt-lr: Bottom-to-top,
left-to-right
bt-rl: Bottom-to-top,
right-to-left
lr-alternating-rl-bt:
Left-to-right lines alternating with right-to-left lines,
bottom-to-top
lr-alternating-rl-tb:
Left-to-right lines alternating with right-to-left lines,
top-to-bottom
lr-bt: Left-to-right,
bottom-to-top
lr-inverting-rl-bt: Left to
right, then move up to the next line and go right to left (that is,
snake up the page like a backward S)
lr-inverting-rl-tb: Left to
right, then move down to the next line and go right to left (that is,
snake down the page like a backward S)
lr-tb: Left to right, top to
bottom
rl-bt: Right to left, bottom
to top
rl-tb: Right to left, top to
bottom
tb-lr: Top to bottom, left
to right
tb-rl: Top to bottom, right
to left
tb-rl-in-rl-pairs: Text is
written in two character, right-to-left pairs; the pairs are then
laid out top-to-bottom to form a line; lines are laid out from
right-to-left
To
a typesetter, an orphan is a single line of a paragraph at the bottom
of a page. A widow is a single line of a paragraph at the top of a
page. Good typesetters move an extra line from the previous page to
the next page or from the next page to the previous page as necessary
to avoid orphans and widows. You can adjust the number of lines
considered an orphan by setting the orphans property
to an unsigned integer. You can adjust the number of lines considered
a widow by setting the widows property to an
unsigned integer. For instance, if you want to make sure that every
partial paragraph at the end of a page has at least three lines, set
the orphans property to 3. For example:
<fo:simple-page-master master-name="even"
    orphans="3" page-height="11in" page-width="8.5in"
/>XSL-FO supports the full collection of CSS2 aural style properties including:
azimuth
cue
cue-after
cue-before
elevation
pause
pause-after
pause-before
pitch
pitch-range
play-during
richness
speak
speak-header
speak-numeral
speak-punctuation
speech-rate
stress
voice-family
volume
Of course, these probably won’t be relevant in most of the output mediums that XSL-FO currently supports. When and if XSL-FO is implemented directly in Web browsers, these will become more important.
Cross-reference
The aural style properties are discussed in the last section of Chapter 16. They have the same semantics and syntax in XSL-FO as they do in CSS2.
In this chapter, you learned about XSL formatting objects. In particular, you learned that:
An XSL processor follows the instructions in an XSLT style sheet to transform an XML source document into a new XML document marked up in the XSL formatting object vocabulary.
Most XSL formatting objects generate one or more rectangular areas. Pages contain regions. Regions contain block areas. Block areas contain block areas and line areas. Line areas contain inline areas. Inline areas contain other inline areas and character areas.
The root element of a formatting object
document is fo:root. This contains
fo:layout-master-set elements and fo:page-sequence
elements.
Each fo:layout-master-set
element contains one or more fo:simple-page-master elements,
each of which defines the layout of a particular kind of page by
dividing it into five regions (before, after, start, end, and body)
and assigning properties to each one. It may also contain one or more
fo:page-sequence-master elements.
Each fo:page-sequence
element contains zero or one fo:title elements, zero
or more fo:static-content elements, one or more
fo:flow elements, and a master-reference
attribute. The contents of the fo:flow are copied
onto instances of the master pages in the order specified by the
fo:page-sequence-master element identified by the
master-reference attribute. The contents of the
fo:static-content elements are copied onto every
page that's created.
The fo:external-graphic
element loads an image from a URL and displays it inline.
The fo:instream-foreign-object
element displays an image encoded in a non-XSL-FO XML application
such as SVG or MathML embedded in the XSL-FO document.
The fo:basic-link element
creates a hypertext link to a URL.
A list is a block-level element created by a
fo:list-block element. It contains block-level
fo:list-item elements. Each fo:list-item
contains a fo:list-item-label and fo:list-item-body,
and each of these contains block-level elements.
The fo:page-number element
inserts the current page number.
The fo:inline element is a
container used to attach properties to the text and areas it
contains.
The fo:footnote element
inserts an out-of-line footnote and an inline footnote reference into
the page.
The fo:float element inserts
an out-of-line block-level element such as a figure or a pull quote
onto the page. The float property determines which
side of the page it floats on and the clear property
determines whether and where other elements are allowed to float
around it.
There are more than 200 separate XSL formatting properties, many of which are identical to CSS properties of the same name. These are attached to XSL formatting object elements as attributes.
The keeps and breaks properties describe
where page breaks are and are not allowed. These include
keep-with-next, keep-with-previous,
keep-together, break-before,
break-after, widows, and orphans.
The hyphenation properties describe whether
and how to insert soft hyphens. These include hyphenate,
hyphenation-character, hyphenation-keep,
hyphenation-ladder-count,
hyphenation-push-character-count, and
hyphenation-remain-character-count.
The indent properties specify how far lines
are indented from the edge of the text. There are four of these:
start-indent, end-indent,
text-indent, and last-line-end-indent.
Character properties describe attributes of
individual characters and include color,
font-family, font-size,
font-size-adjust, font-stretch,
font-style, font-variant,
font-weight, text-transform,
text-shadow, text-decoration, and
score-space.
Sentence properties describe formatting that
only makes sense for groups of letters and words and include
letter-spacing, word-spacing,
line-height, line-height-shift-adjustment,
line-stacking-strategy, text-depth,
text-altitude, text-align,
text-align-last, space-treatment,
white-space-collapse, and wrap-option.
Area properties describe attributes of boxes produced by various formatting objects, and include the background, border, padding, and margin properties.
XSL-FO supports the full complement of aural styles defined in CSS2 for reading documents aloud.
The next
chapter introduces XLinks, a more powerful linking syntax than the
standard HTML A element hyperlinks and XSL’s
fo:basic-link.